A preview of features for Flightgear 3.6

Flightgear is constantly under development and as the feature freeze for the next 3.6 release approaches, it is becoming increasingly clear what the next version will have to offer to users:

(to avoid misunderstandings – this is a selection of features currently under development, not a release note, i.e. there is no guarantee that all items will appear in 3.6, nor is are the features of 3.6 limited to what is listed here)

A complete makeover for the default aircraft

The C-172p has always been Flightgear’s default plane, as it is easy to fly and great to learn the basics of aviation. Thanks to a joint effort of several gifted developers, it just got a lot better. The revised version offers improved flight dynamics with the ability to bring the plane into spins. It makes good use of the latest state of the art of Flightgear’s rendering frameworks, including hires textures, the new internal shadow effect for ALS, environment dependent fogging of the windshield and of course support for the Rembrandt rendering engine.

And it comes with a damage model, creating a very visual impression of what happens if you land too hard:

A new user interface / instructor station

Using Flightgear’s inbuilt web-server, Phi is a new way to access Flightgear from an external device. You can run a web browser on your pad, connect to a running FG instance on your PC and access everything you need from there. This makes for a great training setup in which the instructor can select challenging conditions for the student, monitor the flight or cause failures which need to be responded to. Phi supports pre-flight checklists, environment settings, a moving map widget and many features more.

‘Houston, the Atlantis has reached orbit.’

Launching vertically like a rocket, capable of limited maneuvering in orbit and entering the atmosphere again to land like a plane, the Space Shuttle is a truly unique flying experience. Based on a large body of public domain wind tunnel data by NASA, Flightgear now offers the possibility to take the Shuttle into low orbit and back in a highly realistic simulation.

Experience the strength of the aerodynamical forces during launch as thrust vectoring keeps the Shuttle on its ascent path, learn about the inherent yaw instability of the Shuttle during the hypersonic entry phase and the crucial role of the RCS jets and the body flap, explore how elevon deflection changes the airstream at the aft fuselage and alters roll and yaw stability, or simply start in orbit, enjoy the view or do a spacewalk.

The simulation includes all mission phases with many different digital autopilot settings to control thrust vectoring, RCS jets or airfoils, checks on aerodynamical and structural limits as well as damage and failure simulation in case of limit violations – basically the Shuttle can be flown by the Crew Operations Manual. A 3d cockit is already in place, and work is underway to provide the original avionics.

Rain on the windshield

The Atmospheric Light Scattering rendering framework is rolling out a new suite of effects to render the cockpit interior in more detail. These include a glass shader which renders interior reflection, damage and dirt, glare, raindrop splashes, frost and temperature-dependent fogging and an interior effect capable of drawing shadows, light filtering through colored glass or caustics as well as panel backlight illumination. Enjoy the enhanced immersion into the simulation these features provide!

Regional textures for Latin America

Thanks to local users, the whole of Latin America is receiving more realistic local textures. Look forward to the typical red roofs or urban terrain, to seeing dramatic changes in the water color where the dark Rio Negro meets the muddy Rio Solimoes close to Manaus and to many other nice touches in the area. If you haven’t done it yet, schedule a flight in South America after the next release, there’s lots to explore!

New and improved aircraft

The Citation II provides a new cockpit, making use of plenty of the new effects. Enjoy Flightgear in this nice business jet!

The new F-15 comes with a detailed JSBSim flight dynamics model with lots of wind tunnel data worked in as well as a detailed 3d cockpit with tons of functionality.

And many improvements more

* work on an integrated launcher, specifically making life easier on newer Mac OS distributions
* the aircraft center, a tool to download and manage aircraft in-sim
* expanded functionality of the Canvas 2d rendering framework
* …

Stay tuned as we fly towards our next release!

Simulating the ever-changing scenery

The secrets of the environment settings

If you look at aerial imagery of a region every day for a year, it never changes. Yet if you would fly over the same region in reality every day, it would almost never look the same twice. In reality, nature is a dynamically changing environment, and what you see from a cockpit reflects this.

Some of these changes have to do with weather – on a cloudy day, the light is different from bright sun, the shadows are muted, the amount of haze may change so that faraway terrain looks fainter… and these are readily captured by the weather simulation.

Yet there are more subtle effects. For instance, snow may linger on the ground even on a sunny day with temperatures above freezing if the original layer was thick enough. Snow may fall, but not remain on the ground if the ground is warm enough. In essence, whether you see snow or not depends not so much on how the weather is now, but how it has been the last days, weeks or even months.

Such changes to the scenery in FG are taken care of by the environment settings which control how the terrain is shown. You can find the menu as an entry under Environment.

Currently, the full range of environment effects is only implemented for the Atmospheric Light Scattering (ALS) framework starting from medium quality settings, however the snow effect is available for all rendering frameworks.

Let’s explore some of the things this can do:

Seasonal changes

This is how the default terrain is shown without any environment effects – a summer day in Grenoble:

Moving the season slider somewhat to the right brings autumn coloring into the scene – deciduous tree patches change colors to orange-red, fields and grass appear yellowish:

Changing to a yet later season causes deciduous trees to shed leaves and changes most of the vegetation to a dull brown:

Modifying the snow line and thickness allows to add a sprinkle of snow to the valleys, simulating the first snowfall of late fall:

Finally, adding more snow changes the whole scene into deep winter:

In coastal regions, the appearance of water can also be changed. Here is the coast of Norway near Bergen in summer:

Using the snow and ice sliders allows to simulate winter with lots of drift ice in the sea:

Using a combination of the season and snow settings, it is hence possible to simulate a lot of the seasonal changes during the year. But that’s not all.

Dust and greenery

Have you noticed how colors fade during a long spell of dry weather, to be restored only when rain washes the dust away? Or how a desert might look green for a few weeks after rainfall, to change to its usual dusty appearance later? The environment system also provides those options – let us take a look at the Sierra Nevada. This is how the chain appears from China Lake (with a good measure of snow added to the peaks):

Using the dust slider makes all the colors fade and lets the scene appear dry:

Using the vegetation slider instead gives a fresh green touch to the desert as if after a rainfall:

Changes may be subtle and affect more than just color. Consider this close-up of a dry runway:

The environment settings allow to make it wet (this will happen automatically when the weather predicts rain, but terrain can be wet without current rainfall). This creates puddles and alters the whole reflectivity of the surface – look at how the light changes:

Finally, adding snow covers the runway partially in snowdrifts:

Why can’t this happen automatically?

The environment subsystem just renders as it is told, it is hence easy to misuse it – think snowfall and ice cover on Caribbean islands for instance. Sometimes, the question gets asked why this is implemented that way, and why parameters aren’t just set automatically.

The answer to that is – based on what should they be set? Flightgear does not include a global climate simulation as would be needed to determine how likely it was that there was e.g. snowfall during the last days or weeks, or that there was a dry summer and hence everything should look dusty.

The idea is that the user can adjust these settings, either based on how the scene currently looks at a location, or based on what the user wants to experience (it’s a simulation after all – there’s nothing wrong with simulating a tropical day in Hawaii on a bleak winter day).

If used with some care, the environment settings offer a chance to experience the same scenery in a hundred different ways, each time subtly different.

If misused, the settings deliver weird to crazy results of course.

For the sake of completeness, for low-performance systems which are unable to run shader effects, using the commandline option –season=winter offers at least the choice between the default summer textures and a snow-covered set of textures, although no control over snowline and thickness.

The magic of light and haze

The ‘Atmospheric Light Scattering’ (ALS) rendering framework

Have you ever admired the beautiful colors of a sunset? Have you maybe wondered why sometimes sunsets show a fantastic palette of glowing red and golden colors in the sky and sometimes a rather muted blue-grey? Have you observed distant hills fade into blue haze while the glittering reflection of the sun on water shifts color to a yellow-orange and asked yourself where the difference comes from? Have you wondered why there’s sometimes a halo visible around the moon?

All these phenomena and more are related to light scattering in the atmosphere. Actually, most of what we see looking out of a cockpit from 36.000 ft is not scenery but light scattered somewhere on haze, clouds or air molecules. To create a realistic impression of a scene during flight, we can’t think of haze being something simple that obscures the scene, instead we have to invest as much attention to rendering haze properly as to the more prominent scene elements. In Flightgear, that’s what the ALS framework is doing.

A little bit of theory

To first approximation, the normal lighting situation of a scene during daytime is that the sun is high in the sky and illuminates an object, from which reflected sunlight falls into the eye. There are thus two light rays – the illumination ray (I-ray) goes from the sun to the object and the observation ray (O-ray) from object to the eye.

In vacuum, that’s all there is to it, and pictures from the surface of the Moon illustrate this – objects remain visible no matter how far away, and any surface which is not in direct light is pitch black.

In an atmosphere, light scattering can affect both the I-ray and the O-ray, and there can be in-scattering and out-scattering. In-scattering corresponds to light from somewhere else in the scene being scattered onto the object (or into the eye), out-scattering corresponds to light from the sun being scattered away from the object or light from the object being scattered away from the eye. I-ray in-scattering causes ambient (non-directional) light – shadows are no longer pitch black but receive still some kind of illumination. Under a thin overcast haze layer, there is for instance strong I-ray in-scattering – while there is lots of light available, it comes from almost everywhere in the sky and no shadows are cast onto the ground. O-ray in- and out-scattering both cause objects being shrouded by haze, but in-scattering causes a bright haze, out-scattering a dark haze effect.

To complicate matters, there are three basic physical scattering mechanisms which can take place: Rayleigh, Mie and diffuse scattering.

* Rayleigh scattering occurs on very small particles – the air molecules themselves or fine dust (‘dry haze‘). It has no preferred direction, but is much stronger for blue light than for red light.

* Mie scattering occurs on larger particles – usually water droplets (‘wet haze‘). It has no color dependence, but is much stronger at small angles than at large angles, i.e. Mie-scattered light almost keeps its original direction.

* diffuse scattering isn’t really a distinct elementary process but the effect of multiple scattering processes over which direction and color specific dependence is blurred, hence diffuse scattering has no color or directional dependence.

Any real scene is hence a mixture of Rayleigh, Mie and diffuse in- and out-scattering on O-ray and I-ray (which makes for a total of 12 scattering channels, out of which 11 are modeled in at least some approximation by ALS – only Mie in-scattering on the I-ray is not considered since it is not very important in practice).

Wet and dry haze

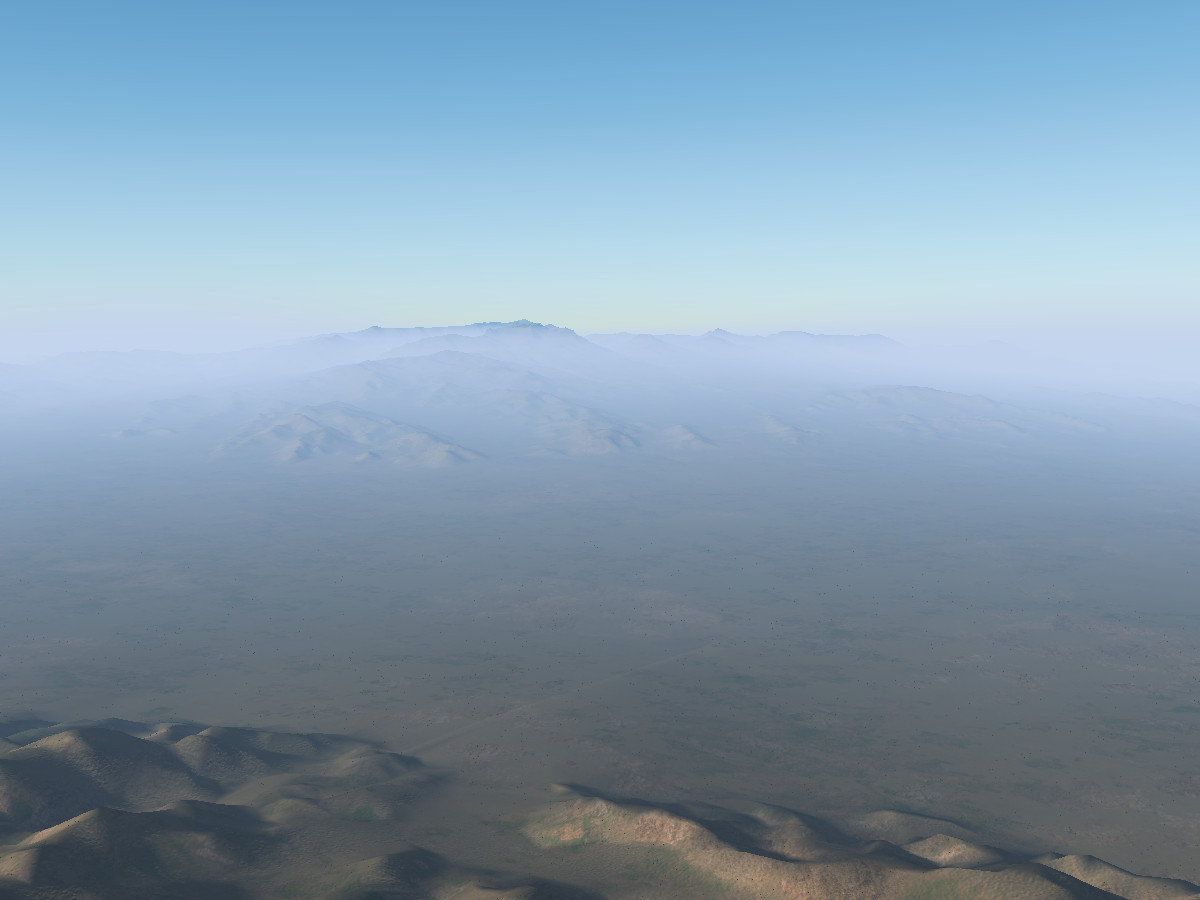
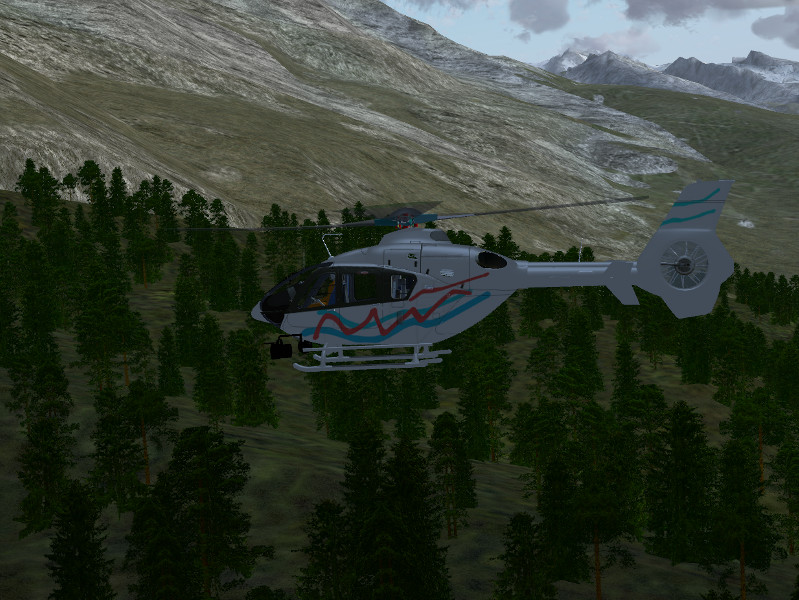
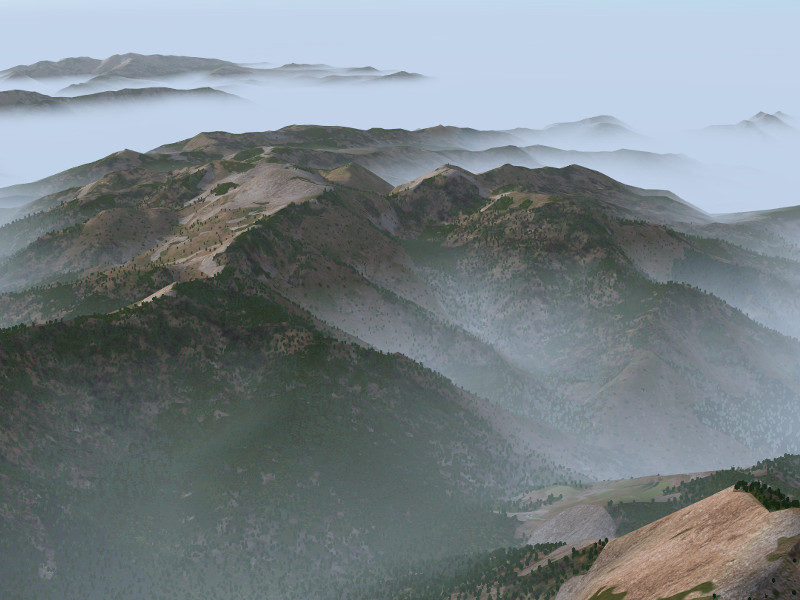
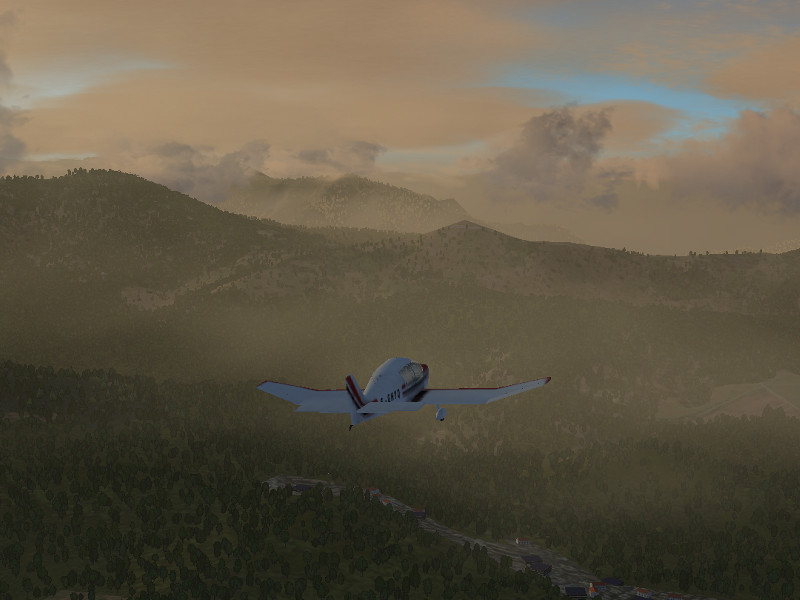
Since most flight-relevant fog is wet haze, in FG the amount of wet haze is directly linked to the reported visibility. In many weather situations, fog is densest in the lowest convective air layer and the air is much cleaner above. ALS hence allows to render a lower layer of volumetric fog in addition to much less dense haze in the upper atmosphere. Seen from above (as in the scene showing morning fog at the foothills of Nanga Parbat), wet haze appears a bright white during the day, but when entering the fog, its color gradually changes to a dark blue-grey as diffuse out-scattering blocks the light.

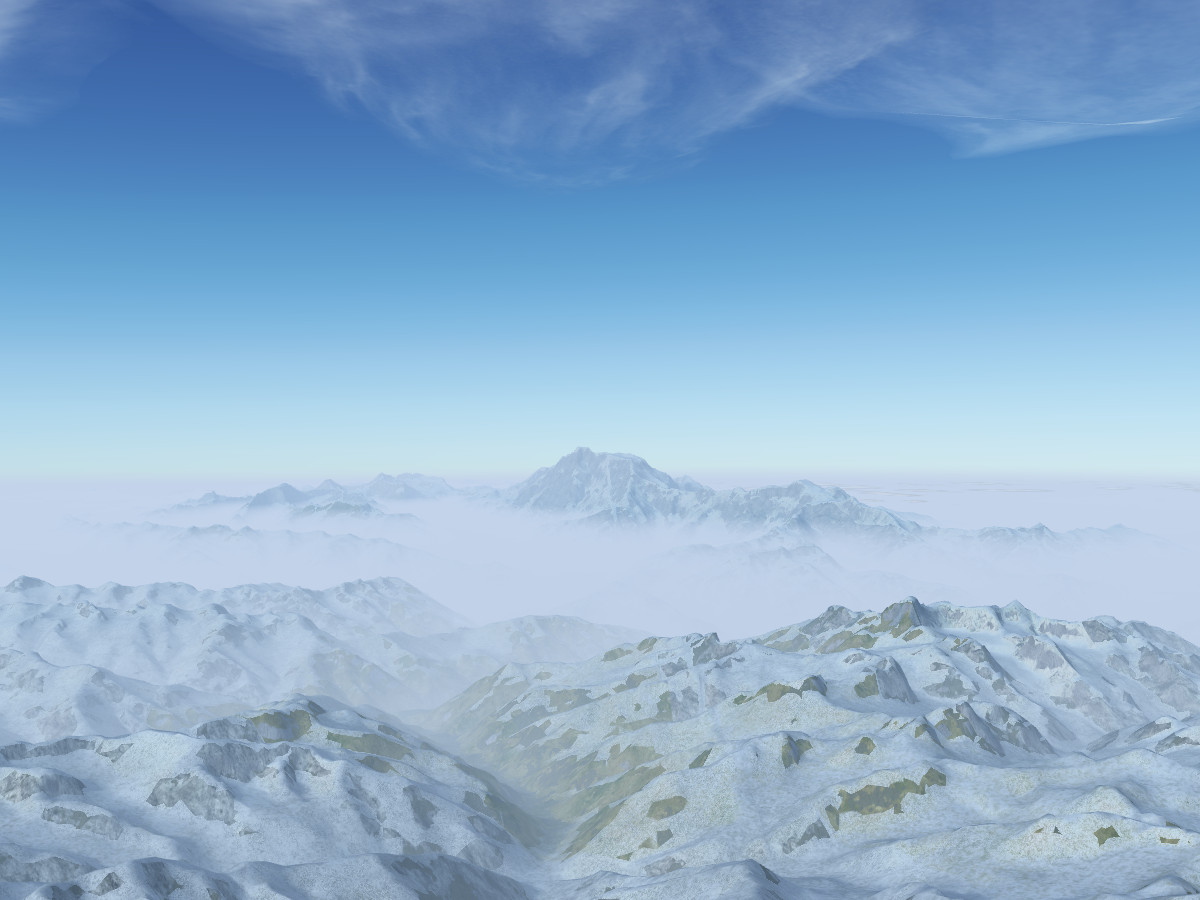
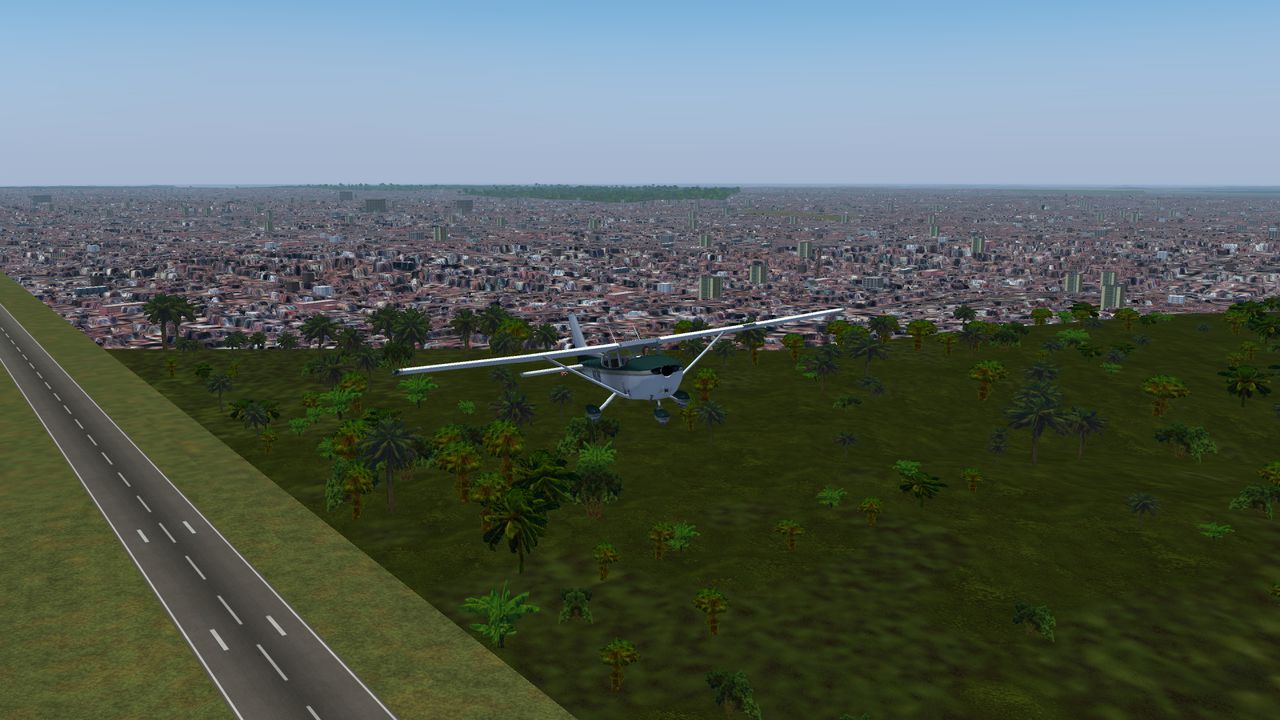
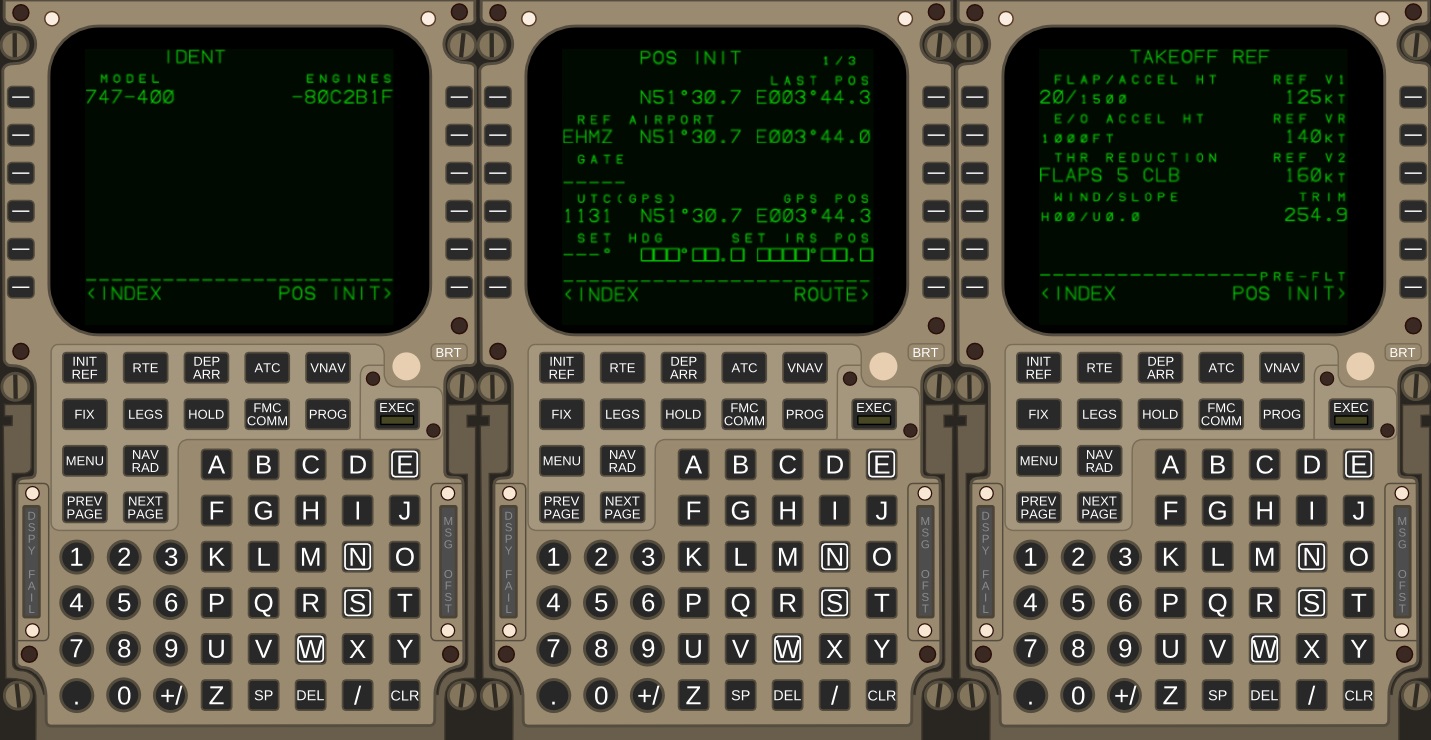
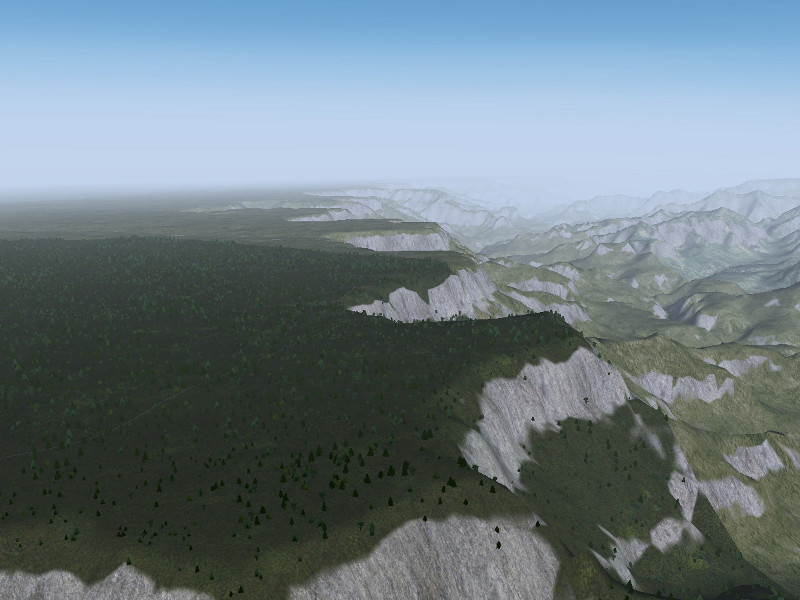
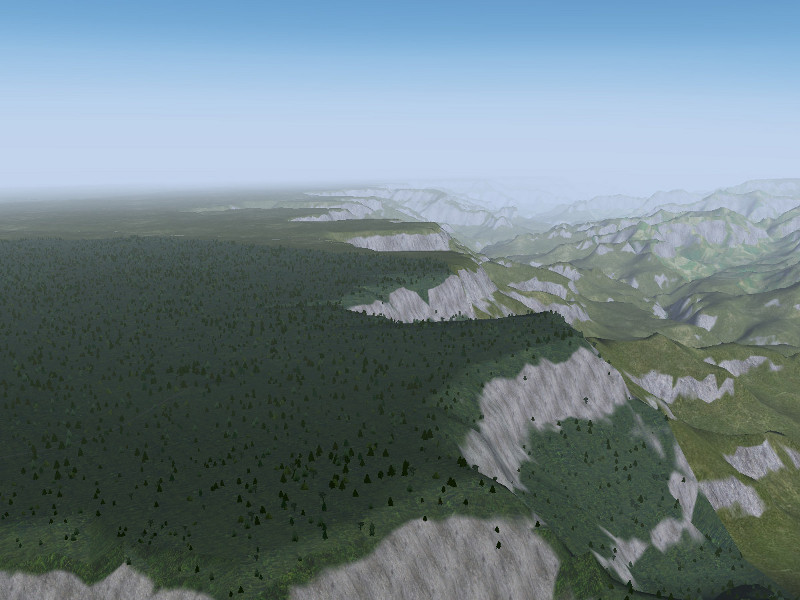
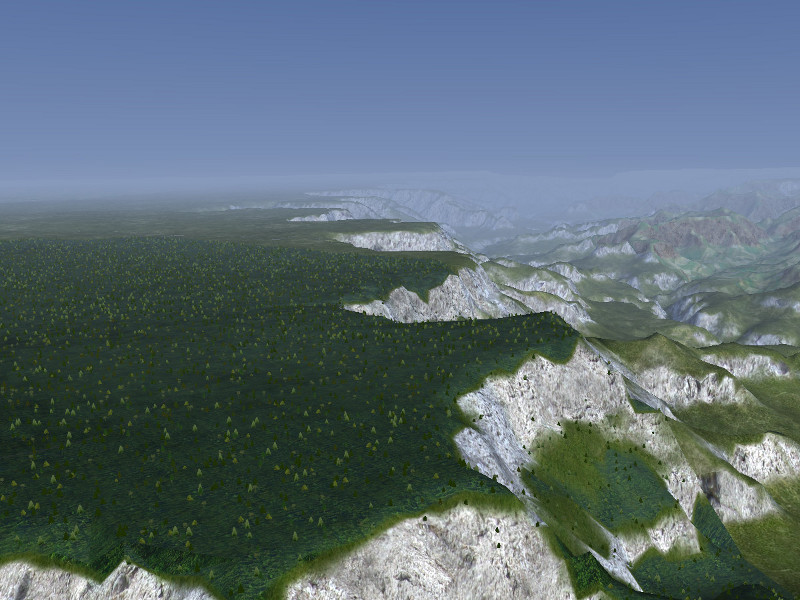
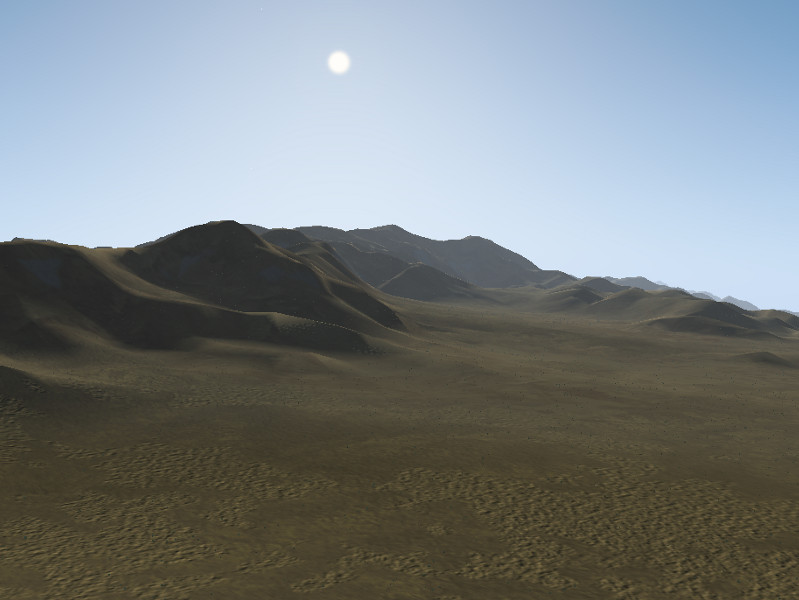
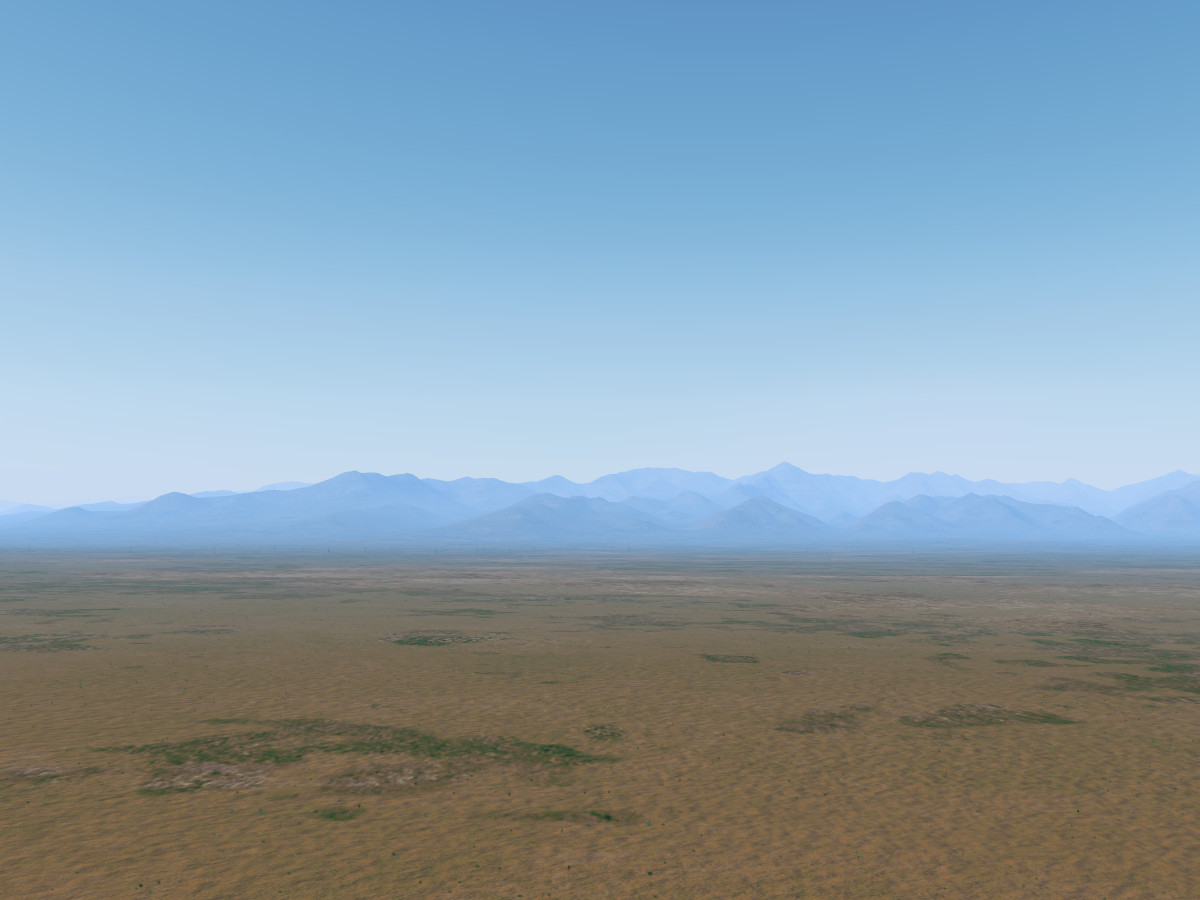
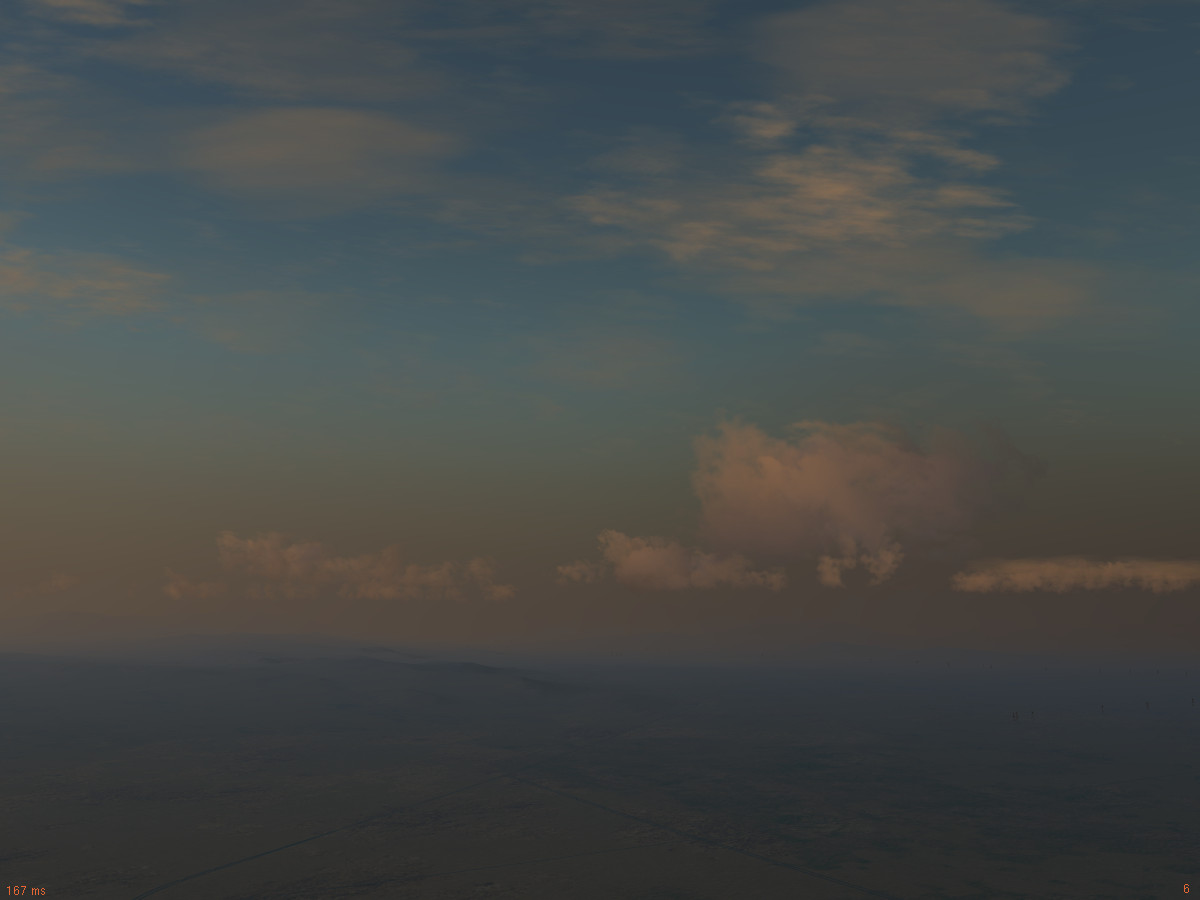
The amount of dry haze (or Rayleigh scattering) relative to the wet haze is controlled by the air pollution slider in the weather configuration. Since Rayleigh haze is stronger for blue light, at large visibility O-ray in-scattering dominates (driven by the strong light coming from above) and far objects appear shifted towards sky-blue in color (such as the Sierra Nevada chain seen from China Lake below):

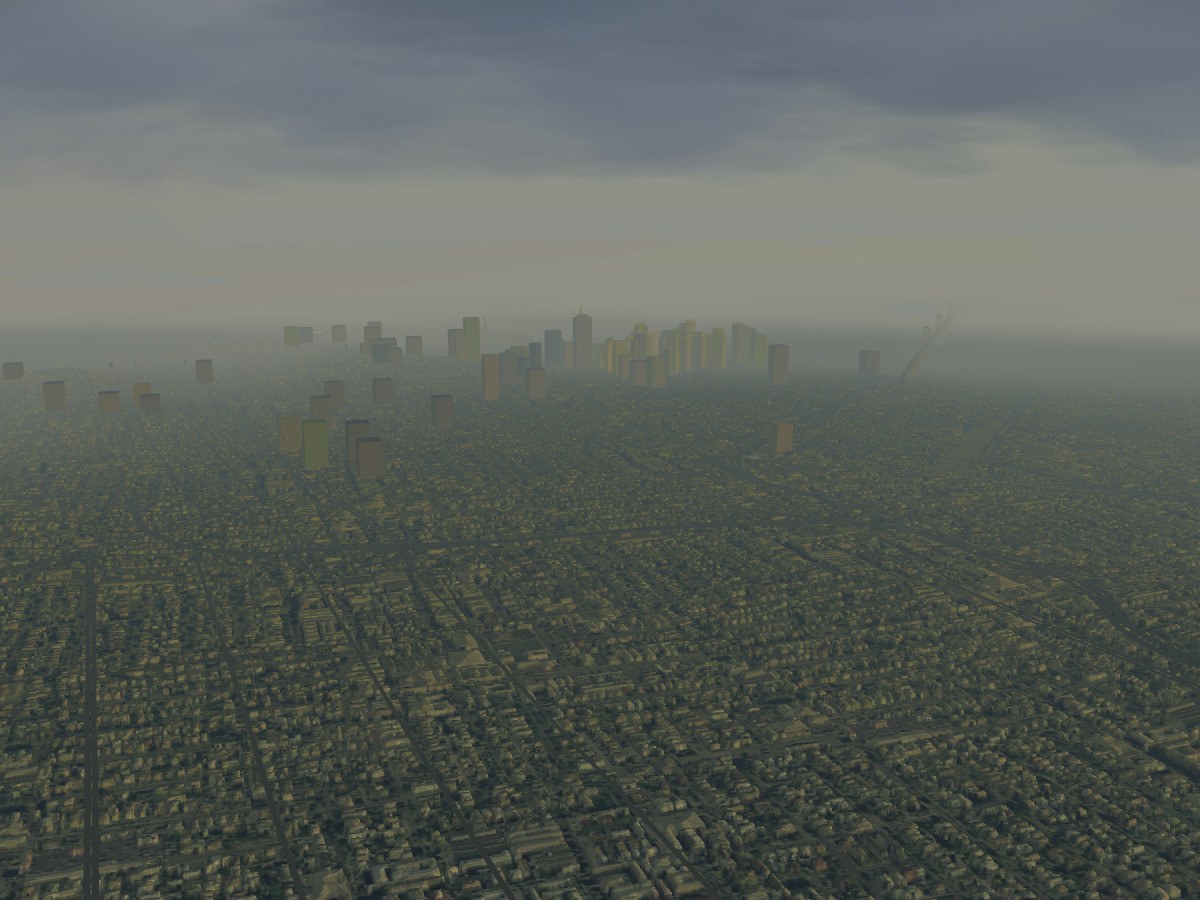
However, if the visibility is poor and/or the incident light from above is blocked, O-ray out-scattering is dominant, and all objects appear shifted to a dirty yellow – in other words, high air pollution makes objects appear in smog (here, downtown San Francisco):

The sky in low light

During the day, the I-ray is typically much shorter than the O-ray because the sunlight crosses the atmosphere vertically. The density of the atmosphere is variable in altitude, but effectively the whole vertical extent correspondsto a length of perhaps 10 km, whereas on a clear day objects 200 km distant can easily be seen. This is why Rayleigh out-scattering for the incoming light is not dominant while the sun is high.

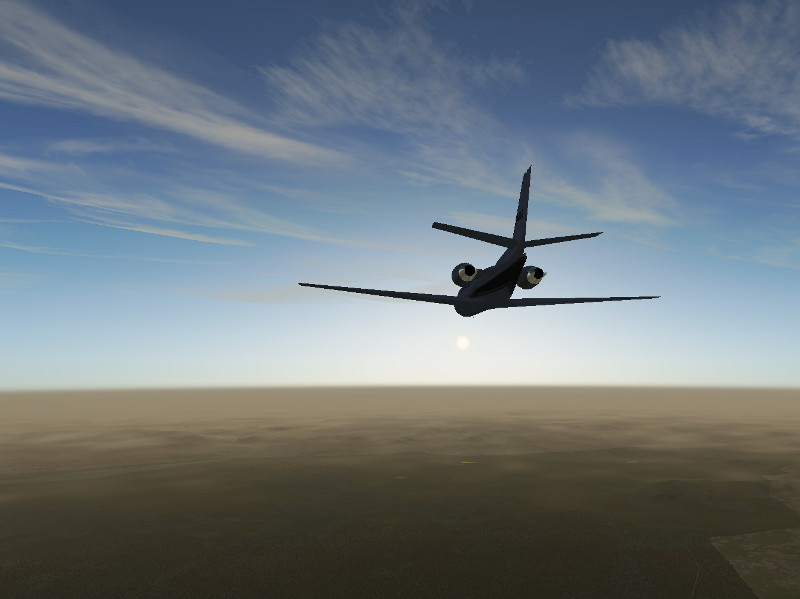
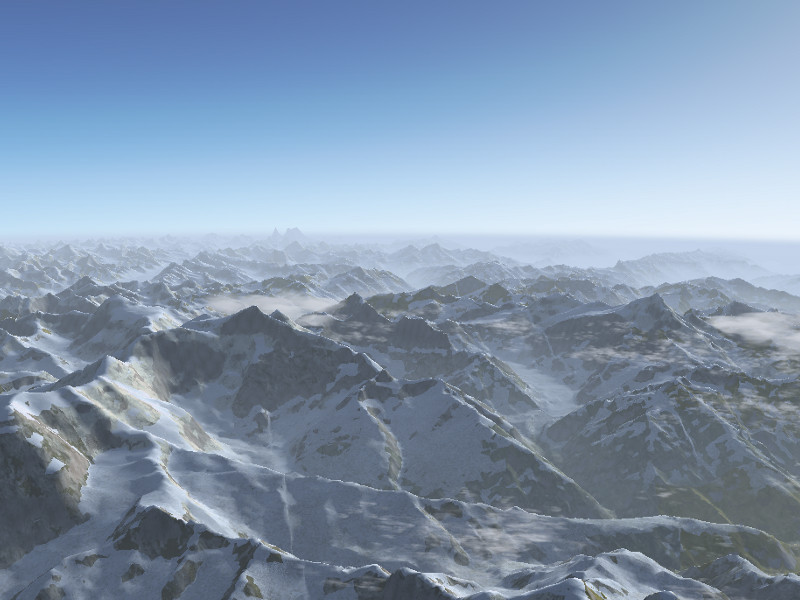
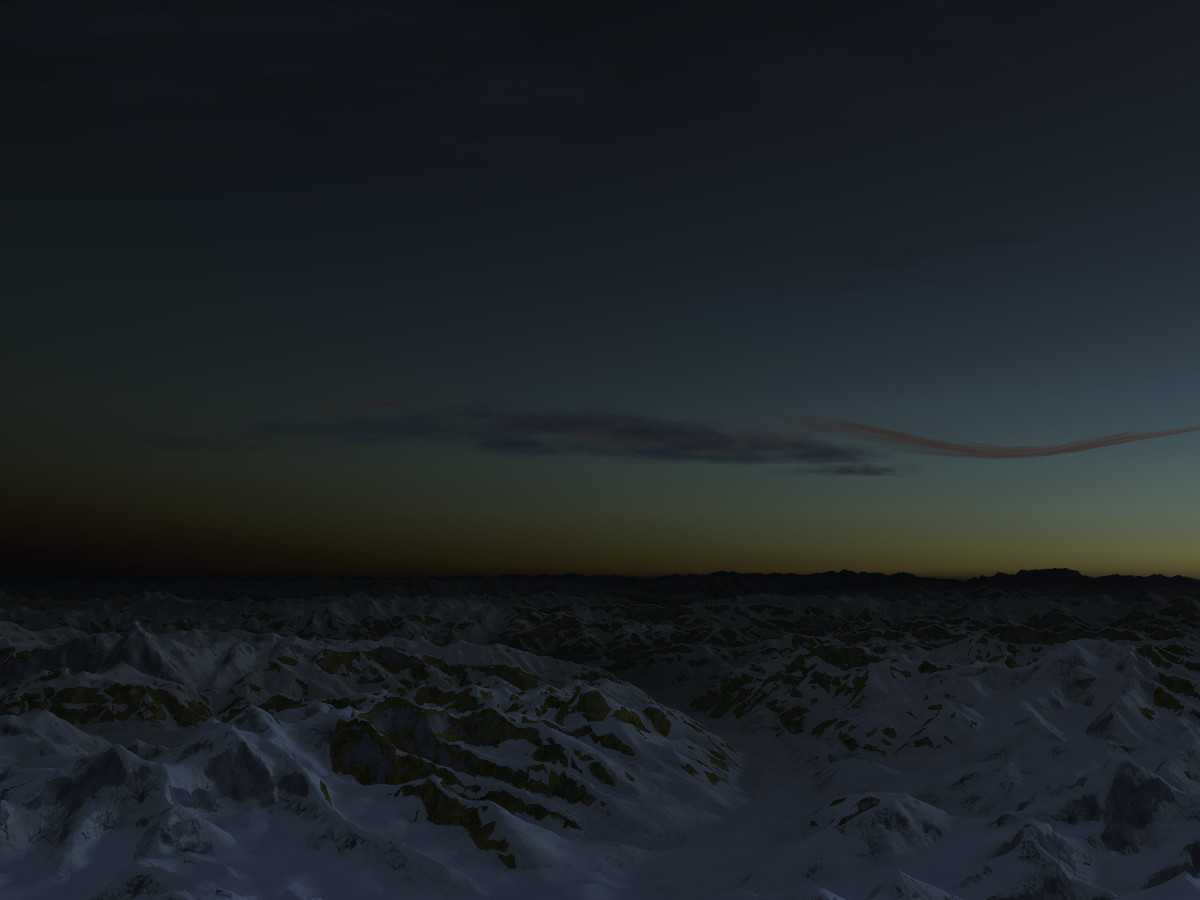
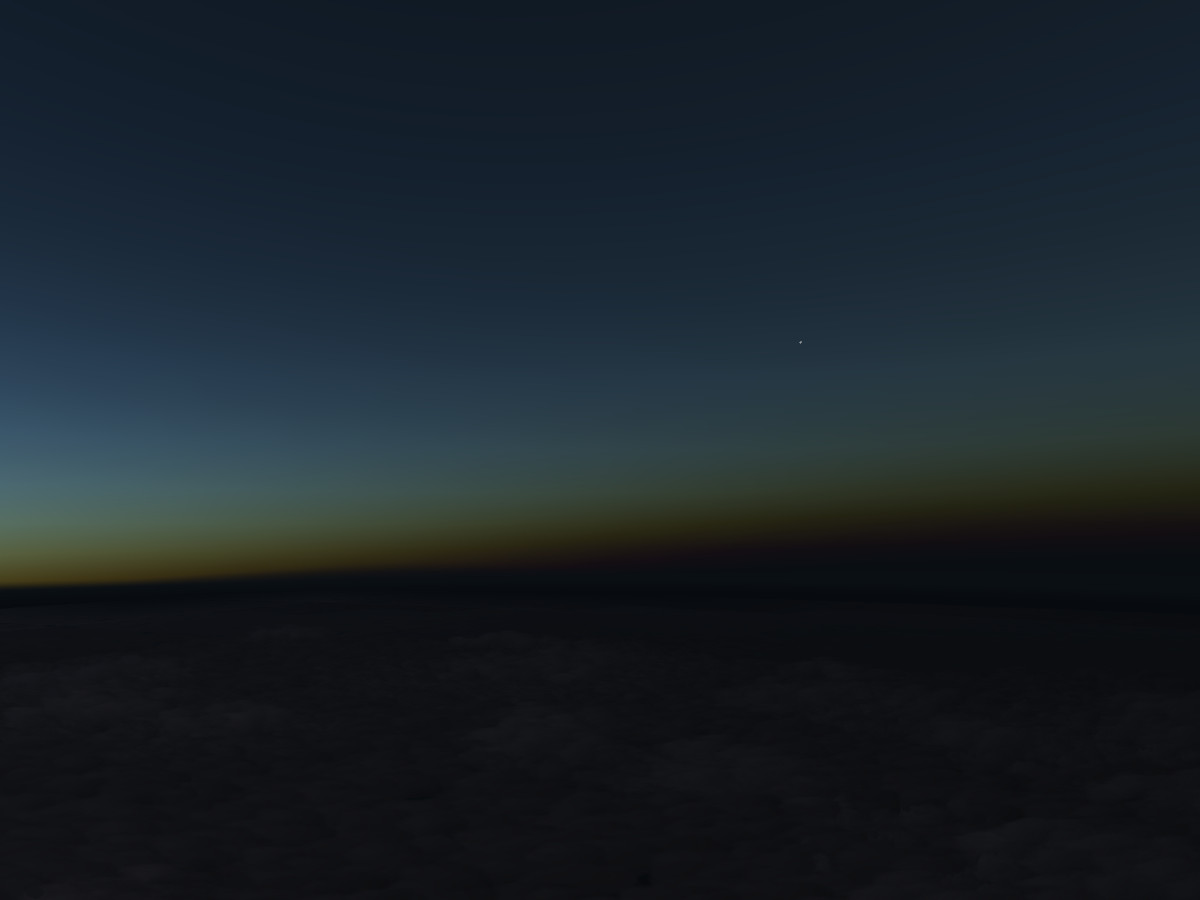
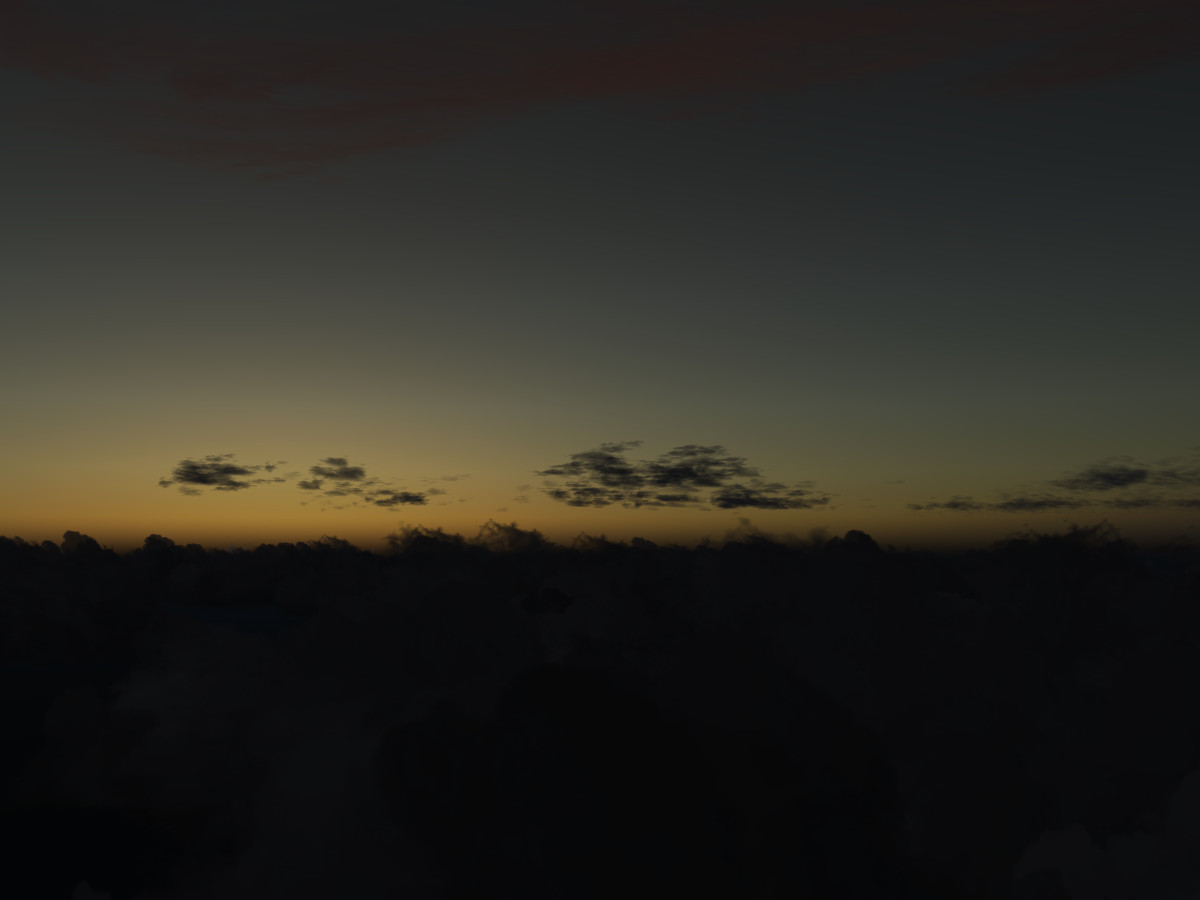
In low light however, the I-ray passes a long distance through the atmosphere, the blue light is scattered out, and hence the direct light of the scene illumination is shifted to red (the indirect light however is driven by Rayleigh in-scattering and hence is shifted to blue). This can be seen here where the sun is below the horizon and illuminates the clear air close to the horizon whereas the lower haze layer is only visible in blue indirect light:

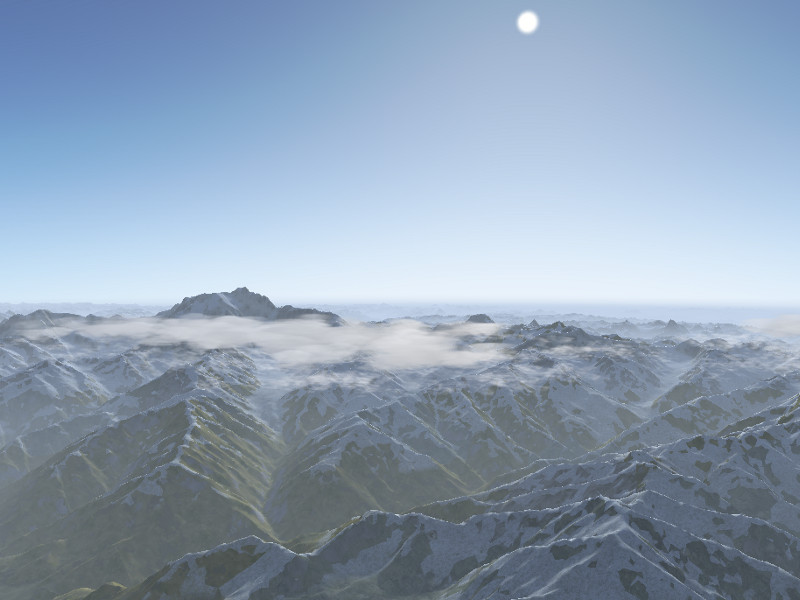
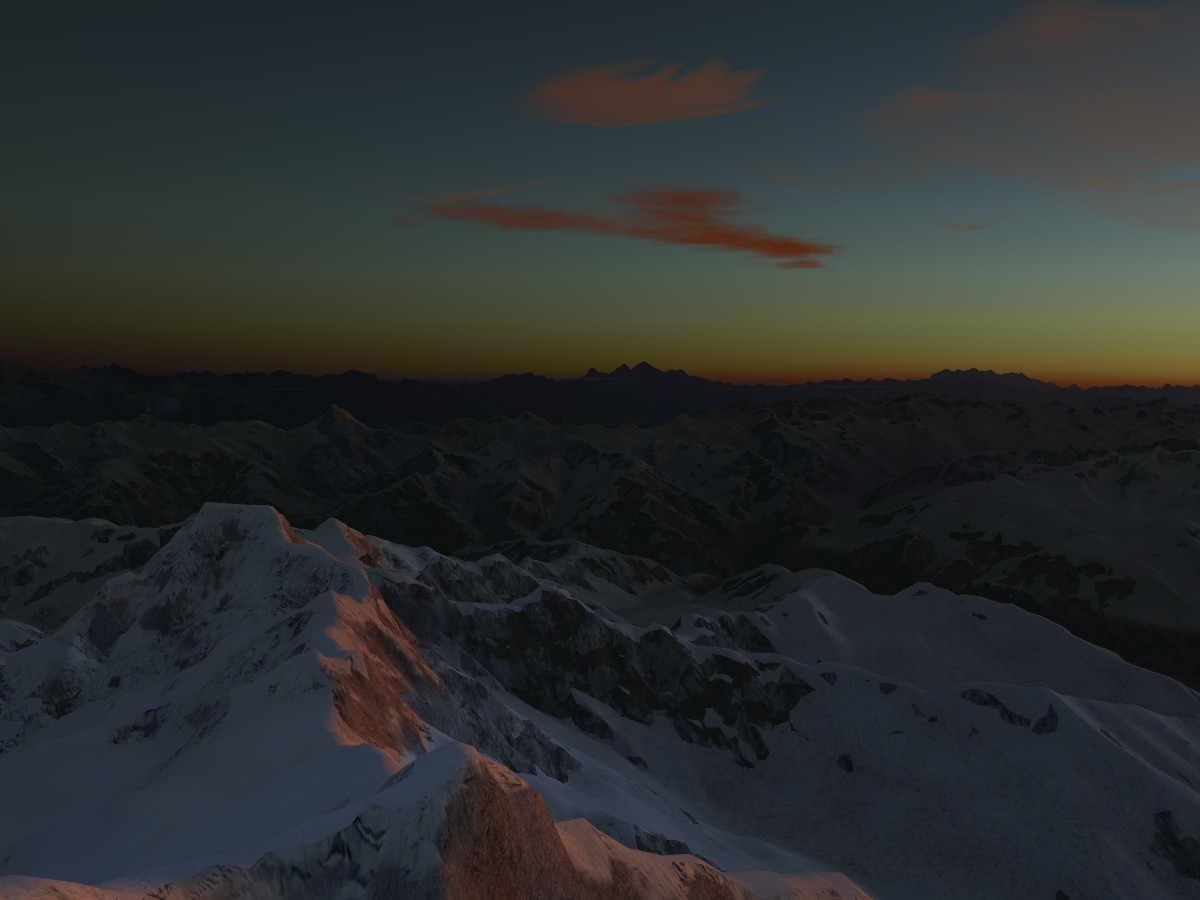
Without a lower haze layer, the whole scene appears in blue indirect light as seen here in the predawn Himalaya

As soon as the sun comes above the horizon and touches the highest peaks, strikingly beautiful contrasts appear between the blue indirect and the red direct illumination, leading to the phenomenon known as Alpenglow:

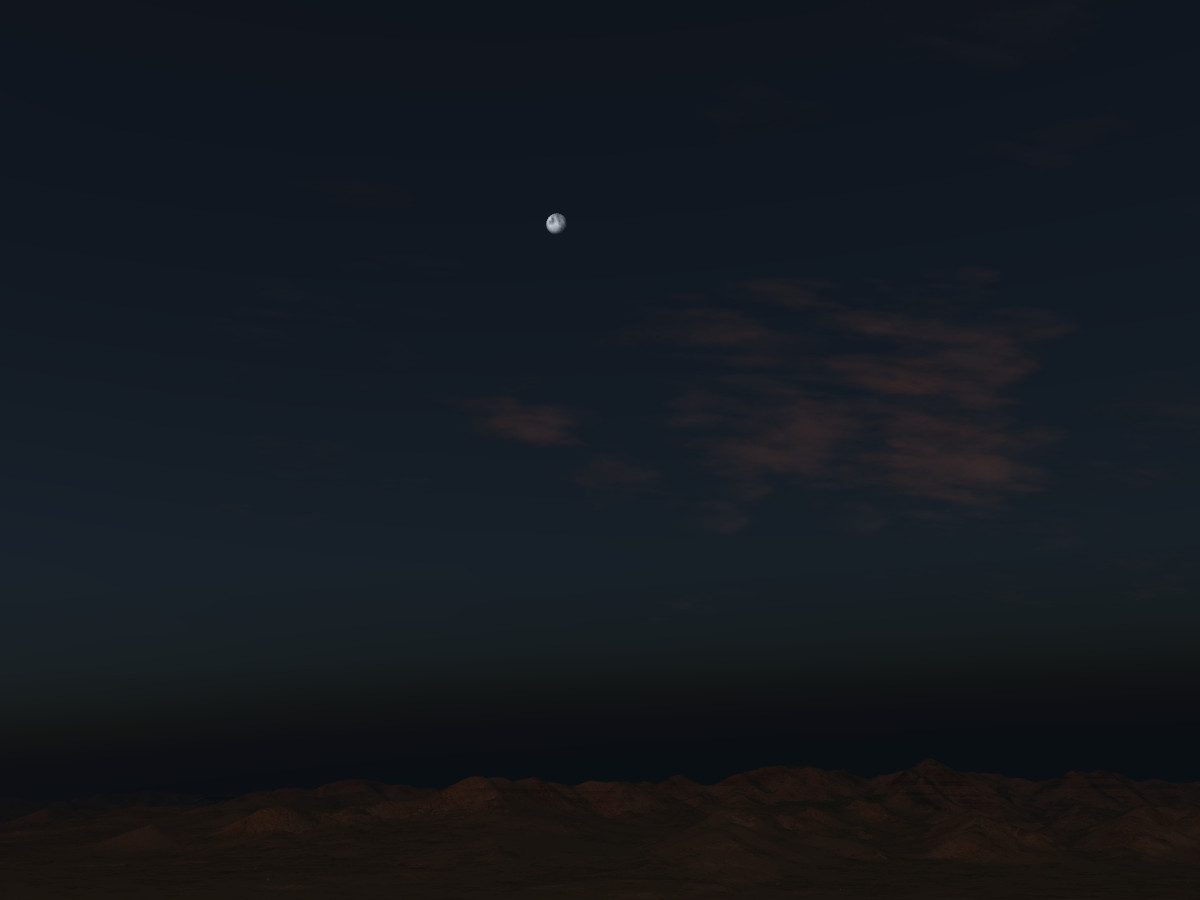
Looking away from the sun in low light, the clear atmosphere takes a deep violet color:

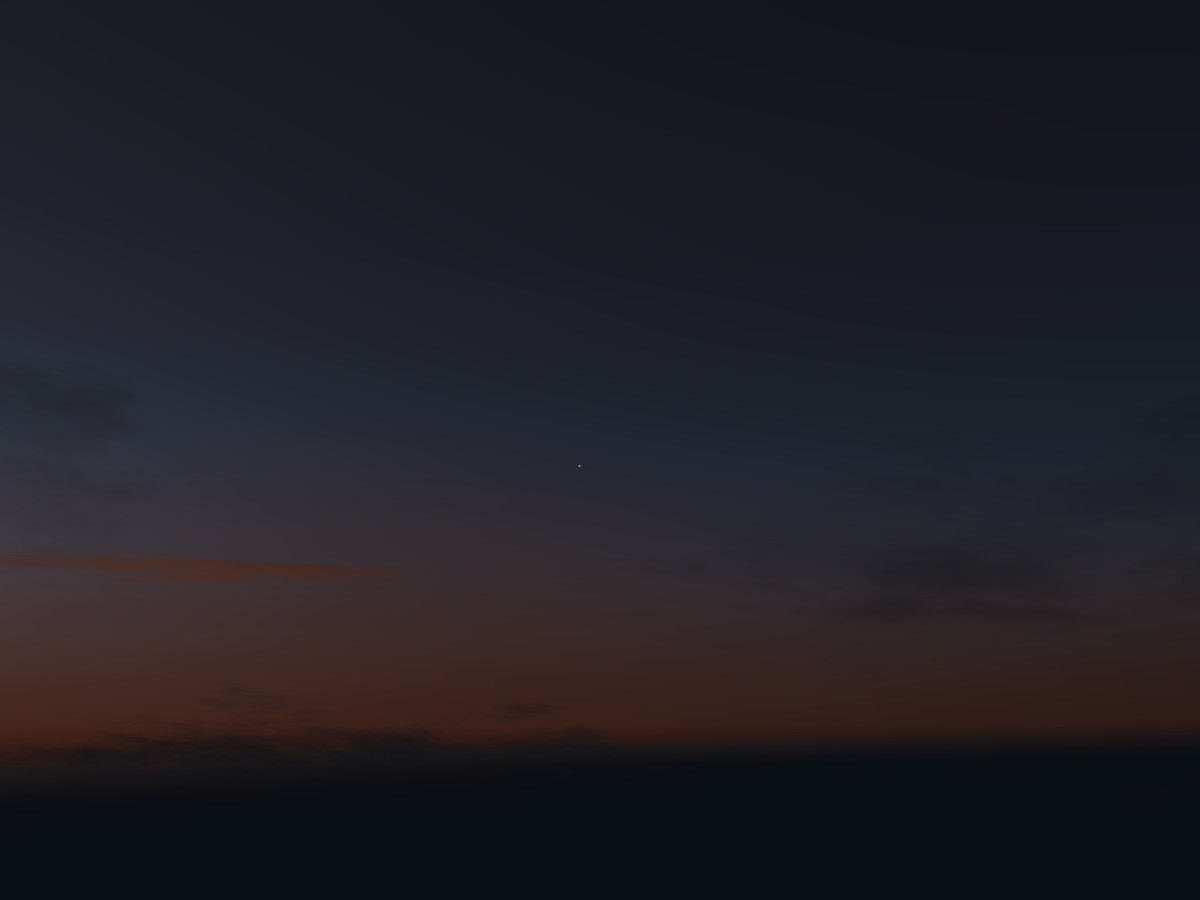
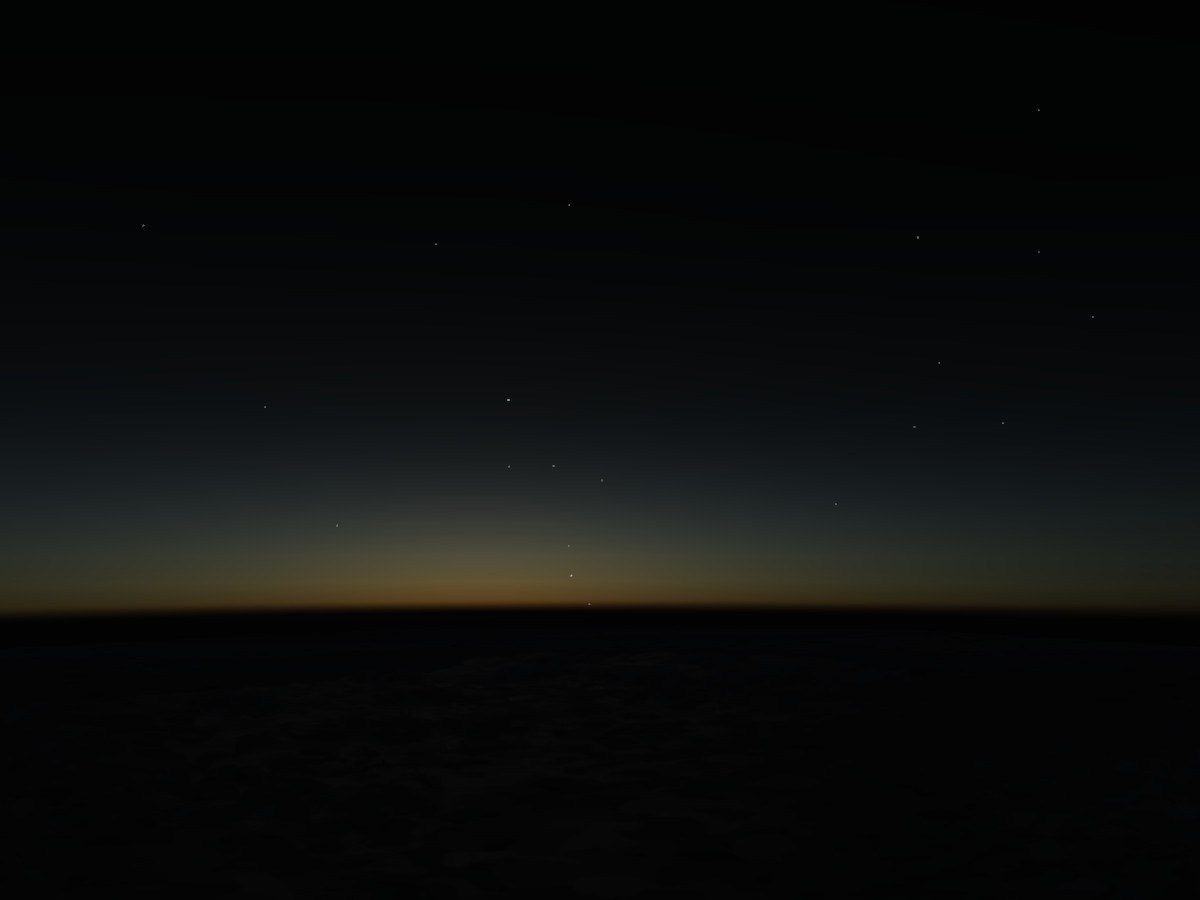
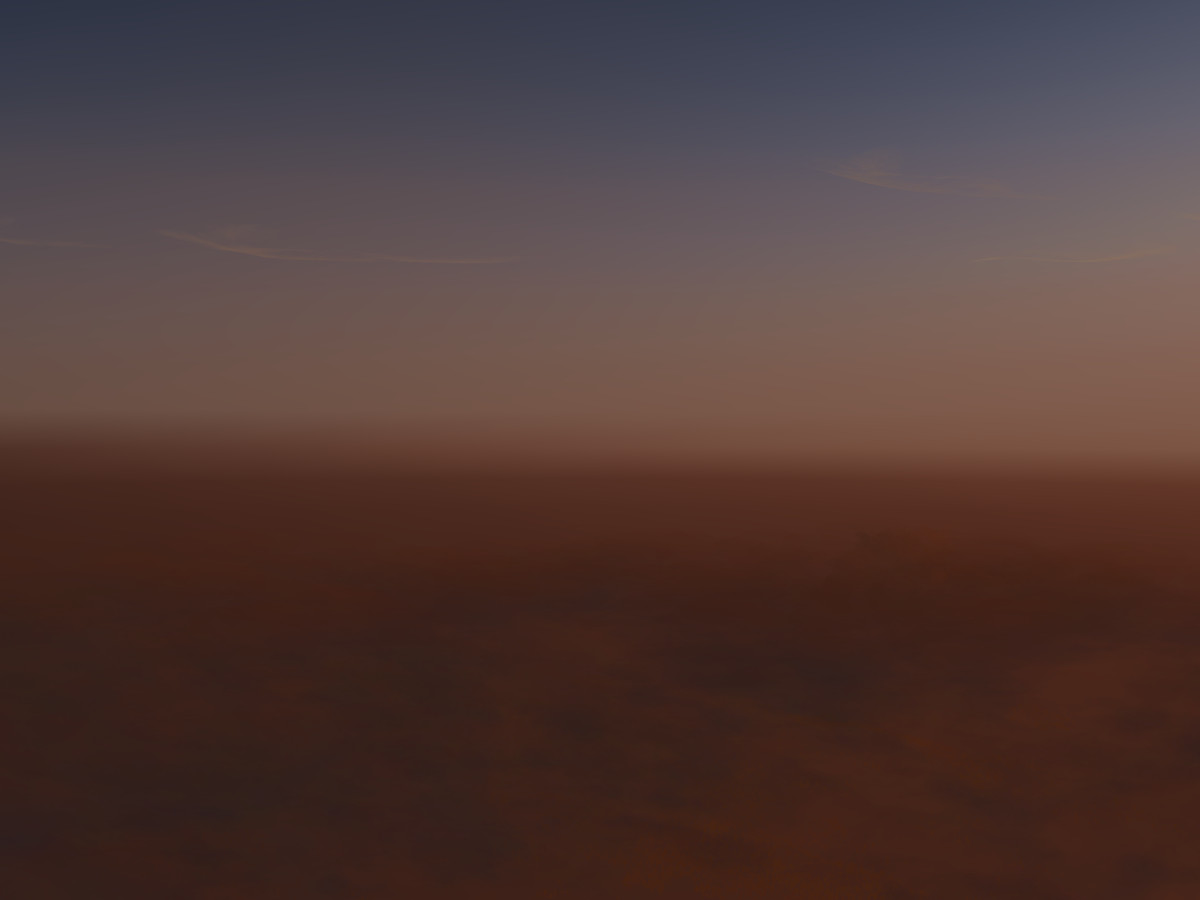
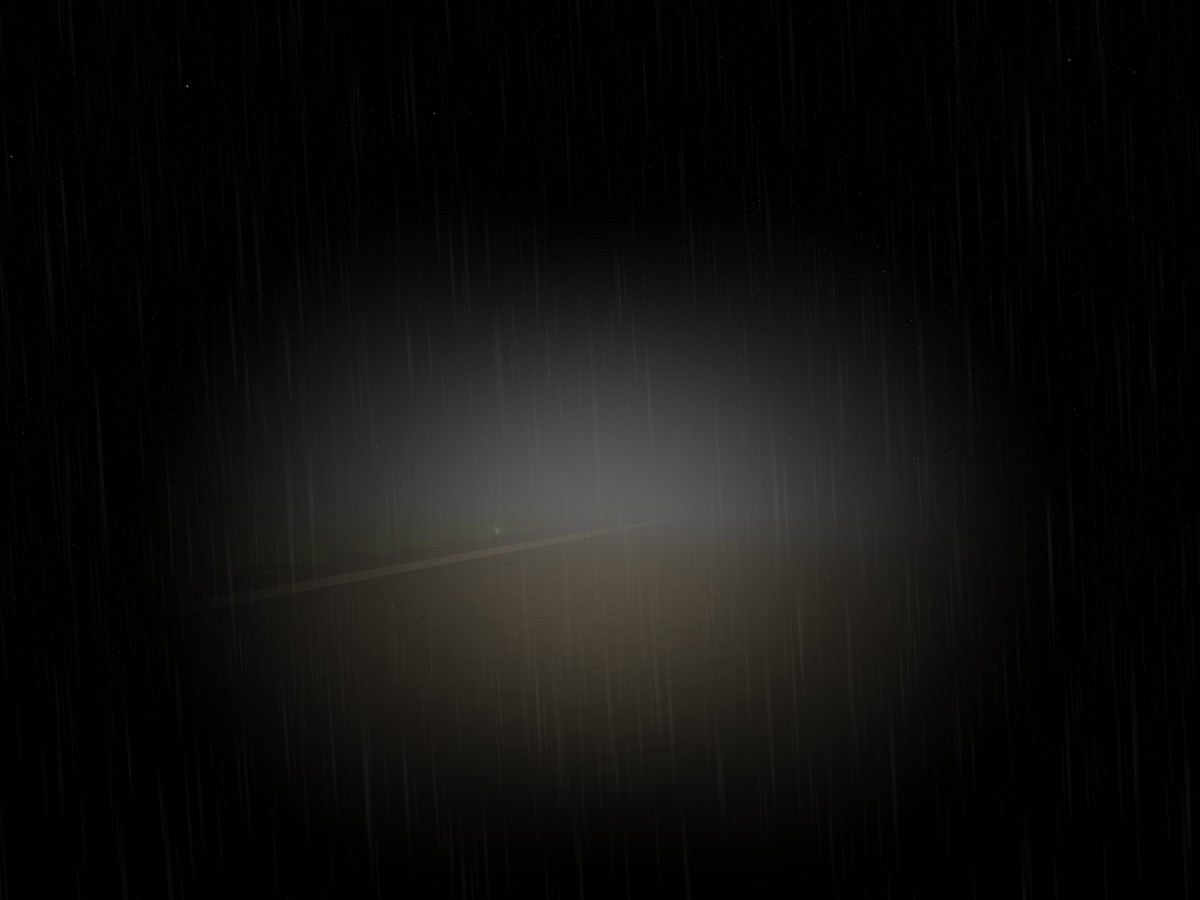
At very early predawn, just the far fringes of the upper atmosphere are illuminated. In clear air, the colors of dawn are muted:

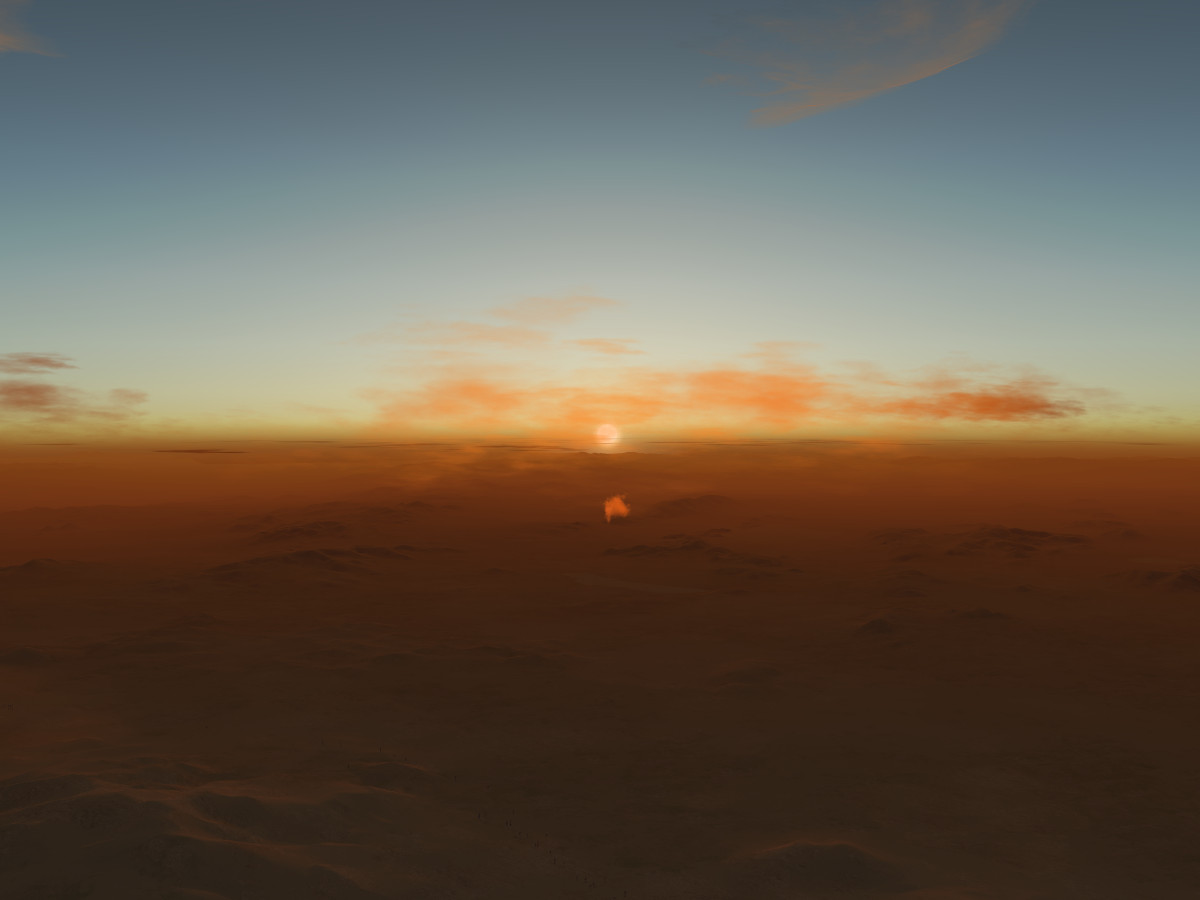
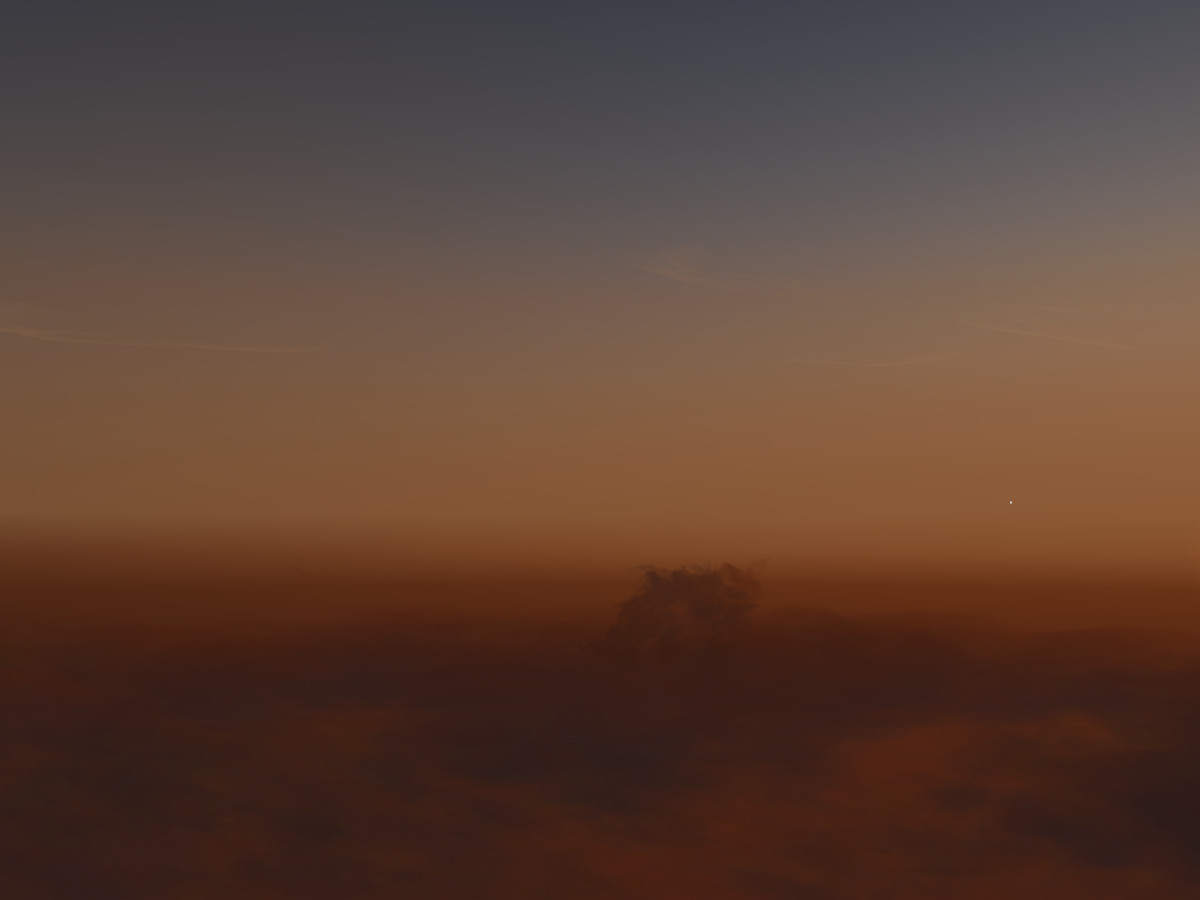
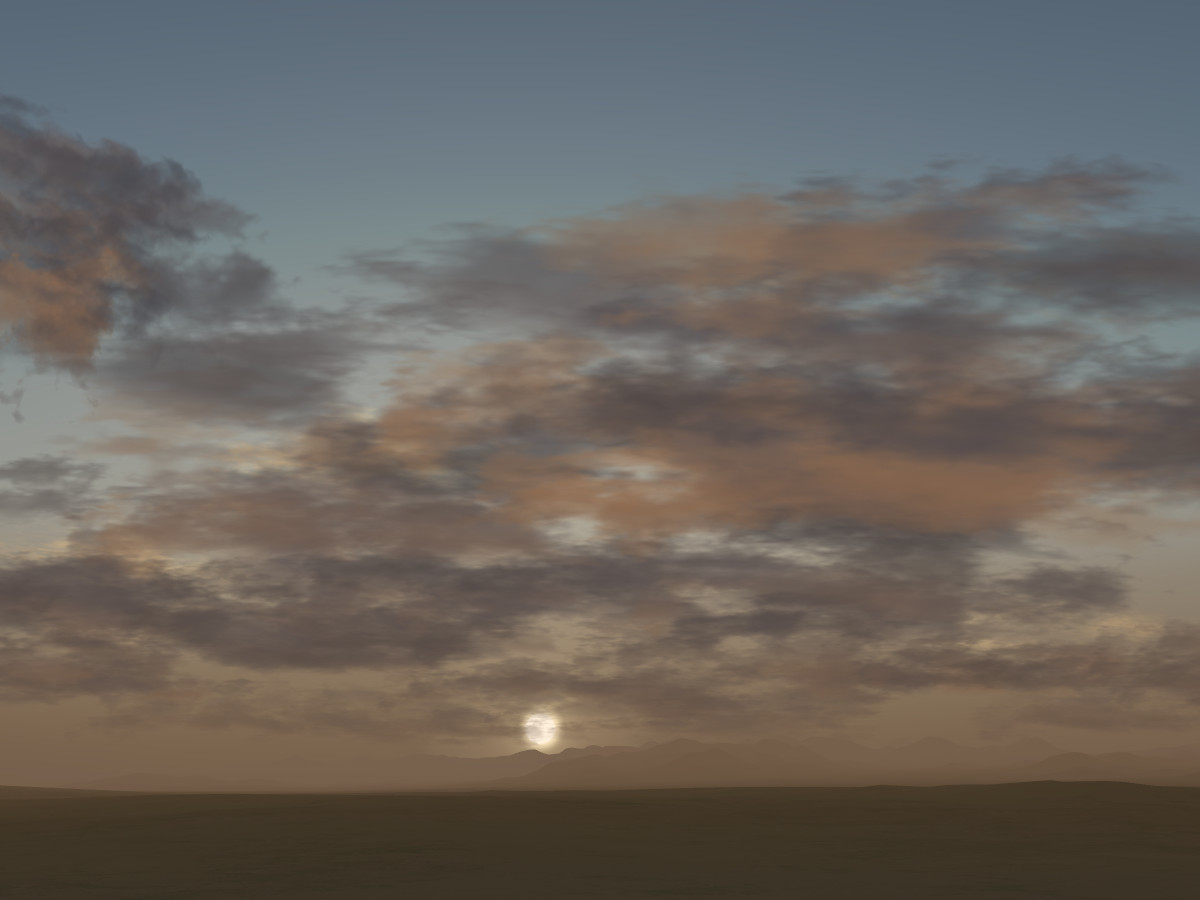
In contrast, here a strong dry haze component leads to a sizable shift of the light to a red-golden color which lets the low wet haze layer glow brightly in the early morning light. While the light illuminating the wet haze is driven by Rayleigh scattering, the wet haze itself is a Mie scatterer – it glows most close to the sun, and the colors get more muted away – this is most evident from the thin clouds in the scene:

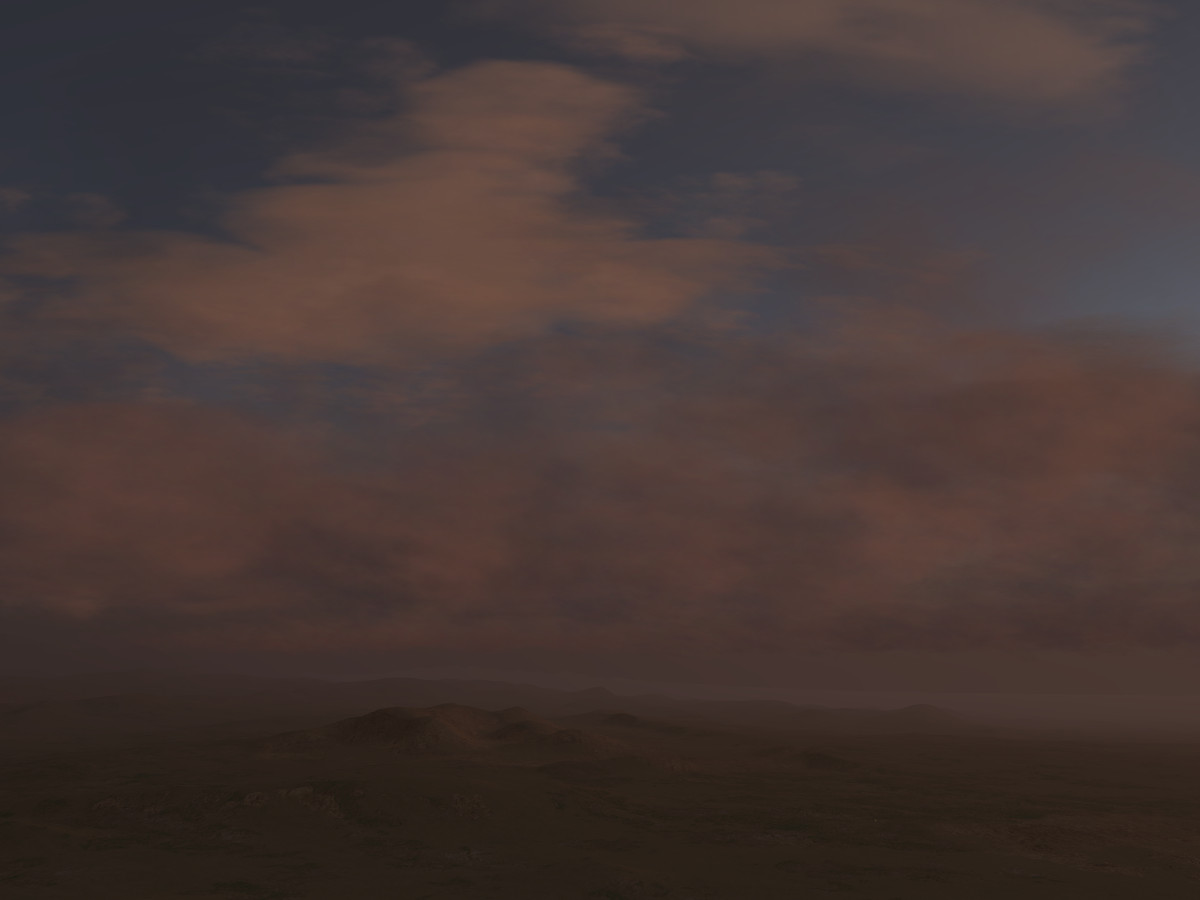
The combination of wet and dry haze can lead to nice and subtle color variations in low light:

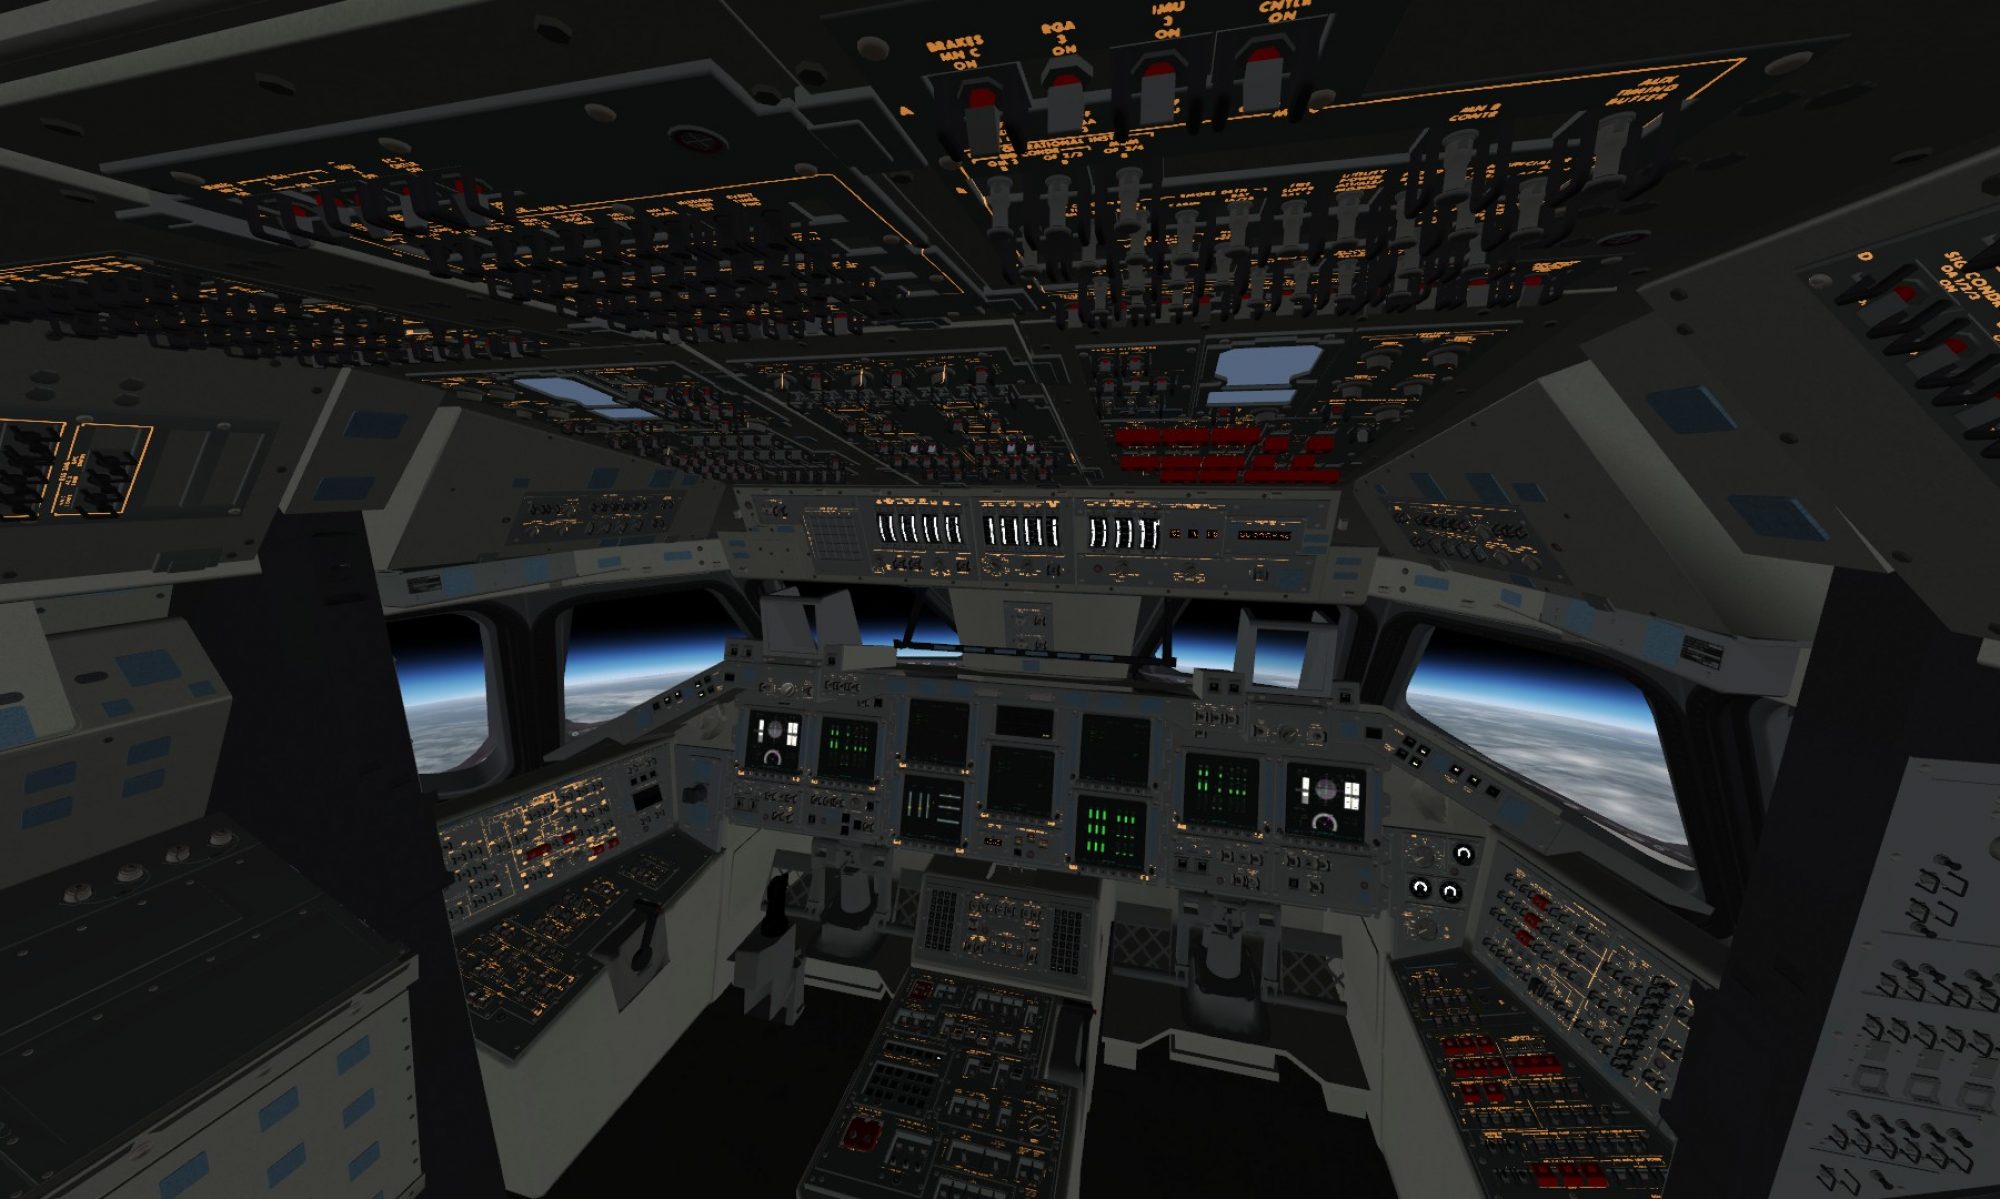
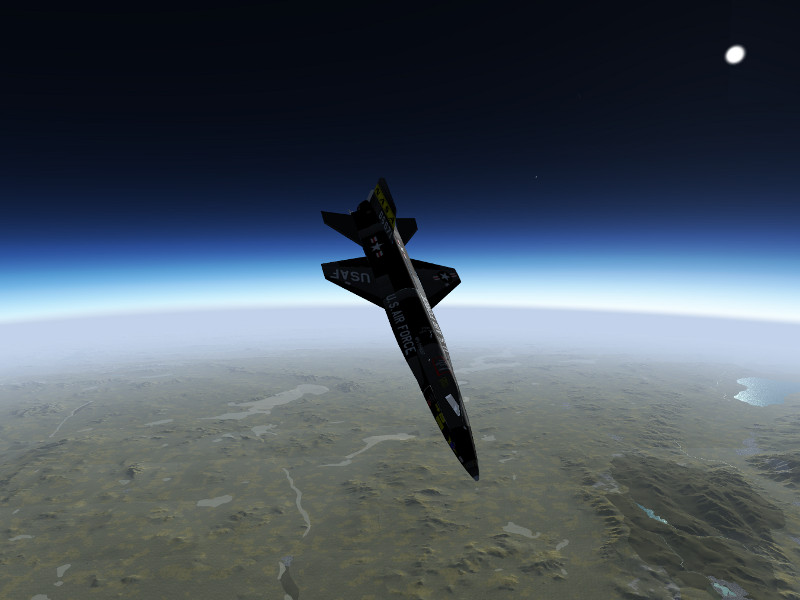
The atmosphere seen from above

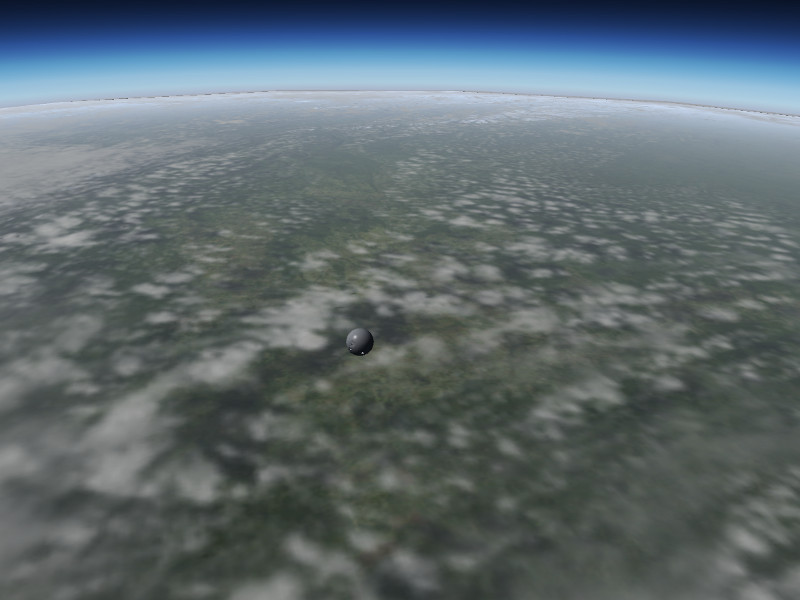
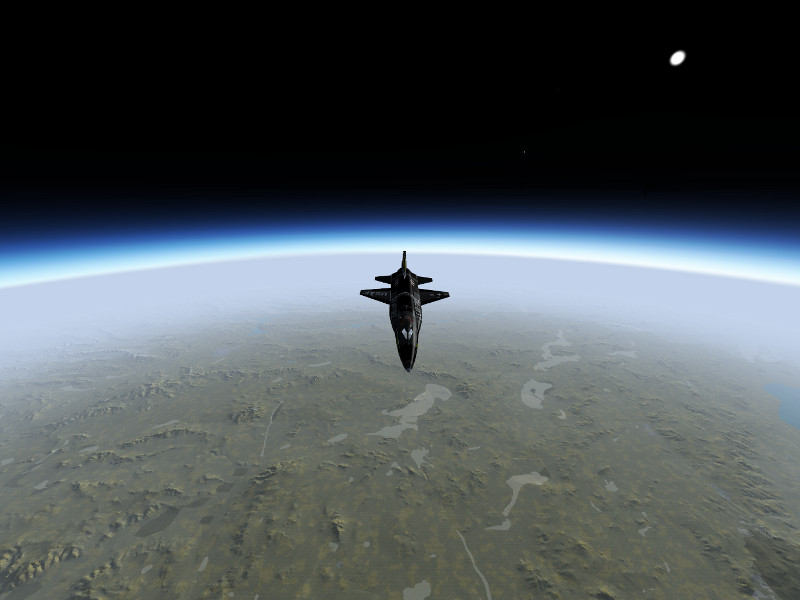
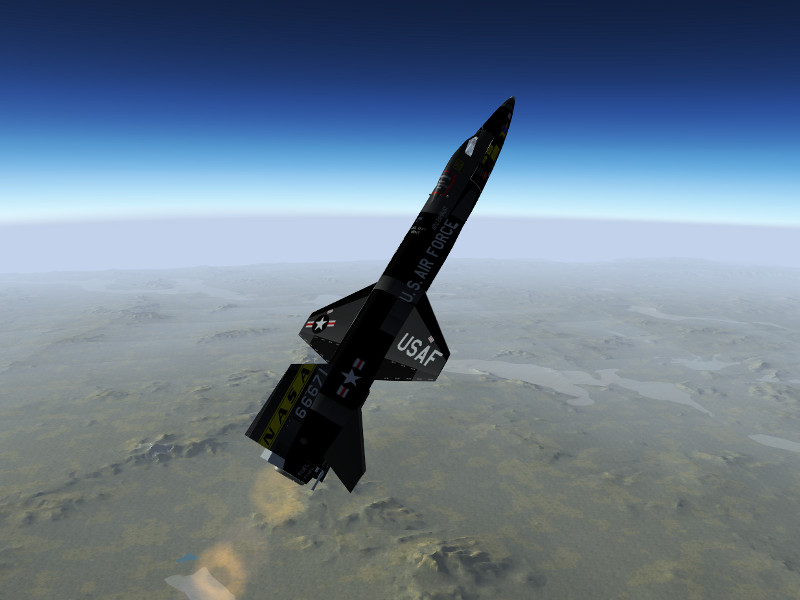
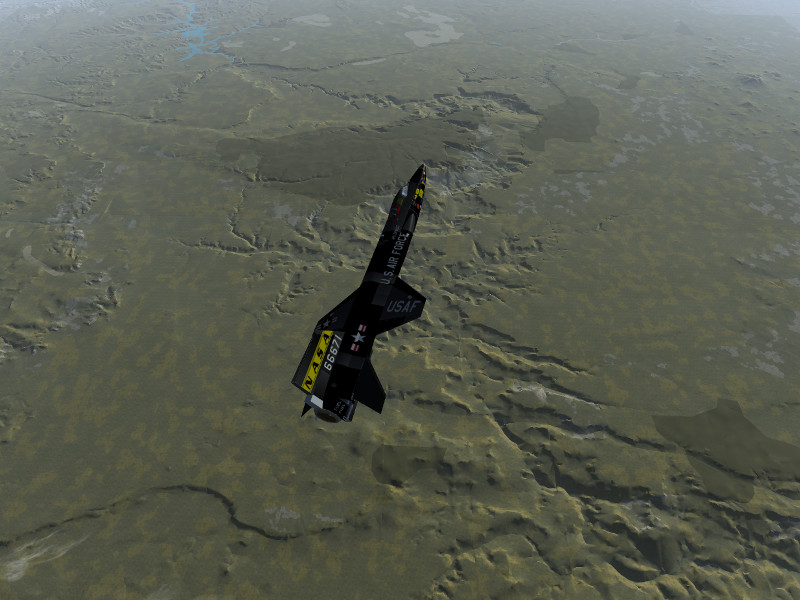
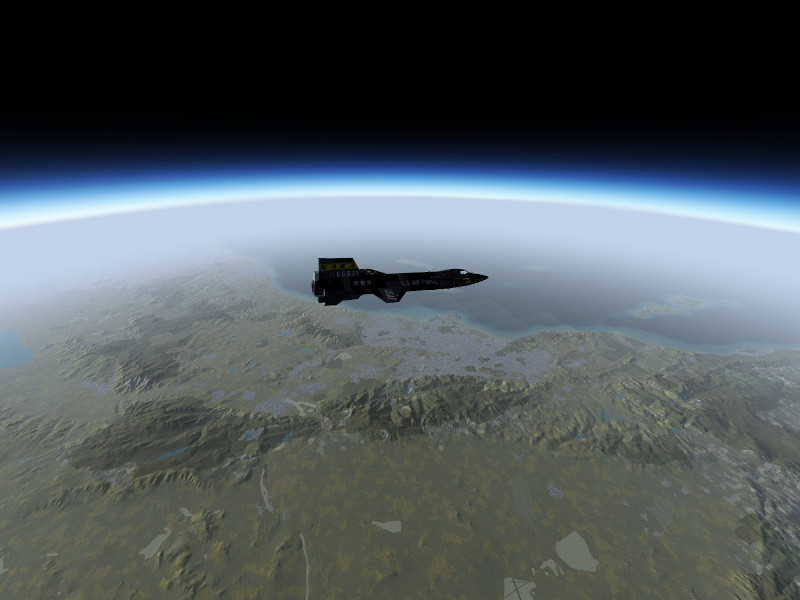
The following screenshots have been rendered with the EarthView orbital rendering option of FG in combination with ALS.

The characteristic electric blue glow of the atmosphere which is so prominently visible from low earth orbit is predominantly driven by Rayleigh scattering in the upper atmosphere.

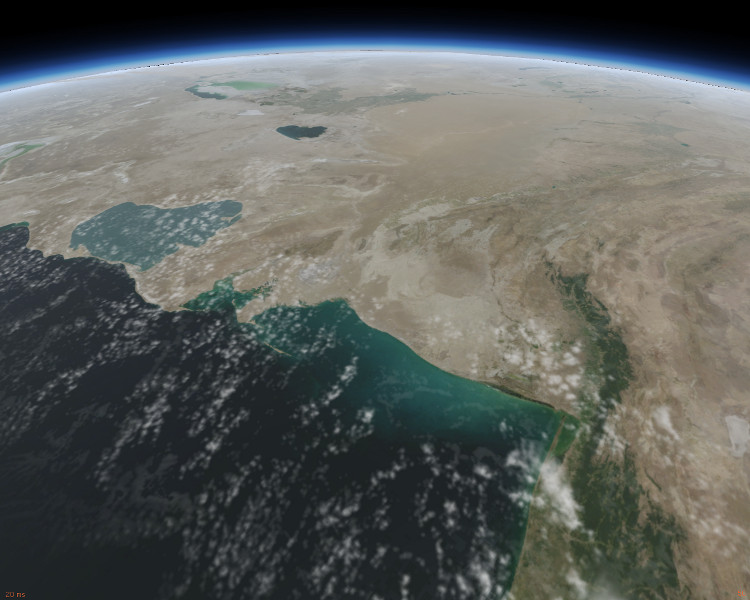
Where the bulk of earth blocks the incoming light, Rayleigh scattering can no longer take place and the glow of the atmosphere gradually fades out:

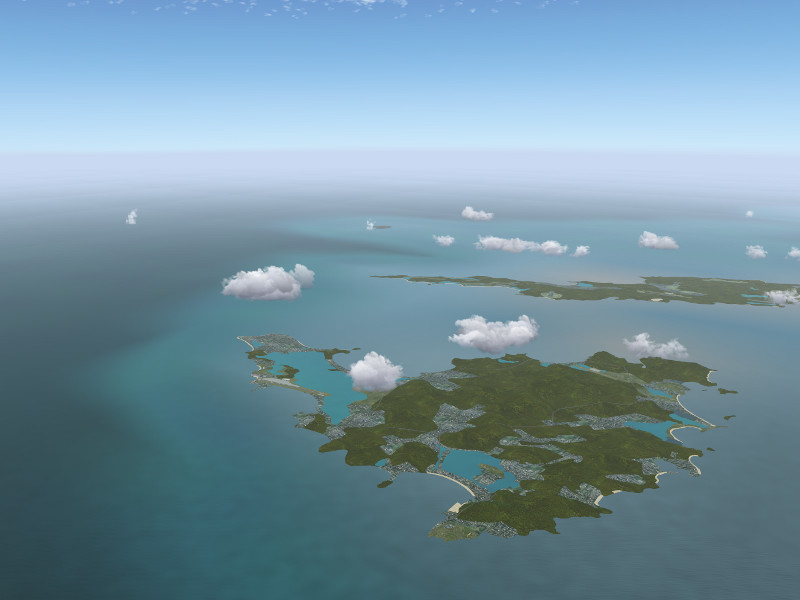
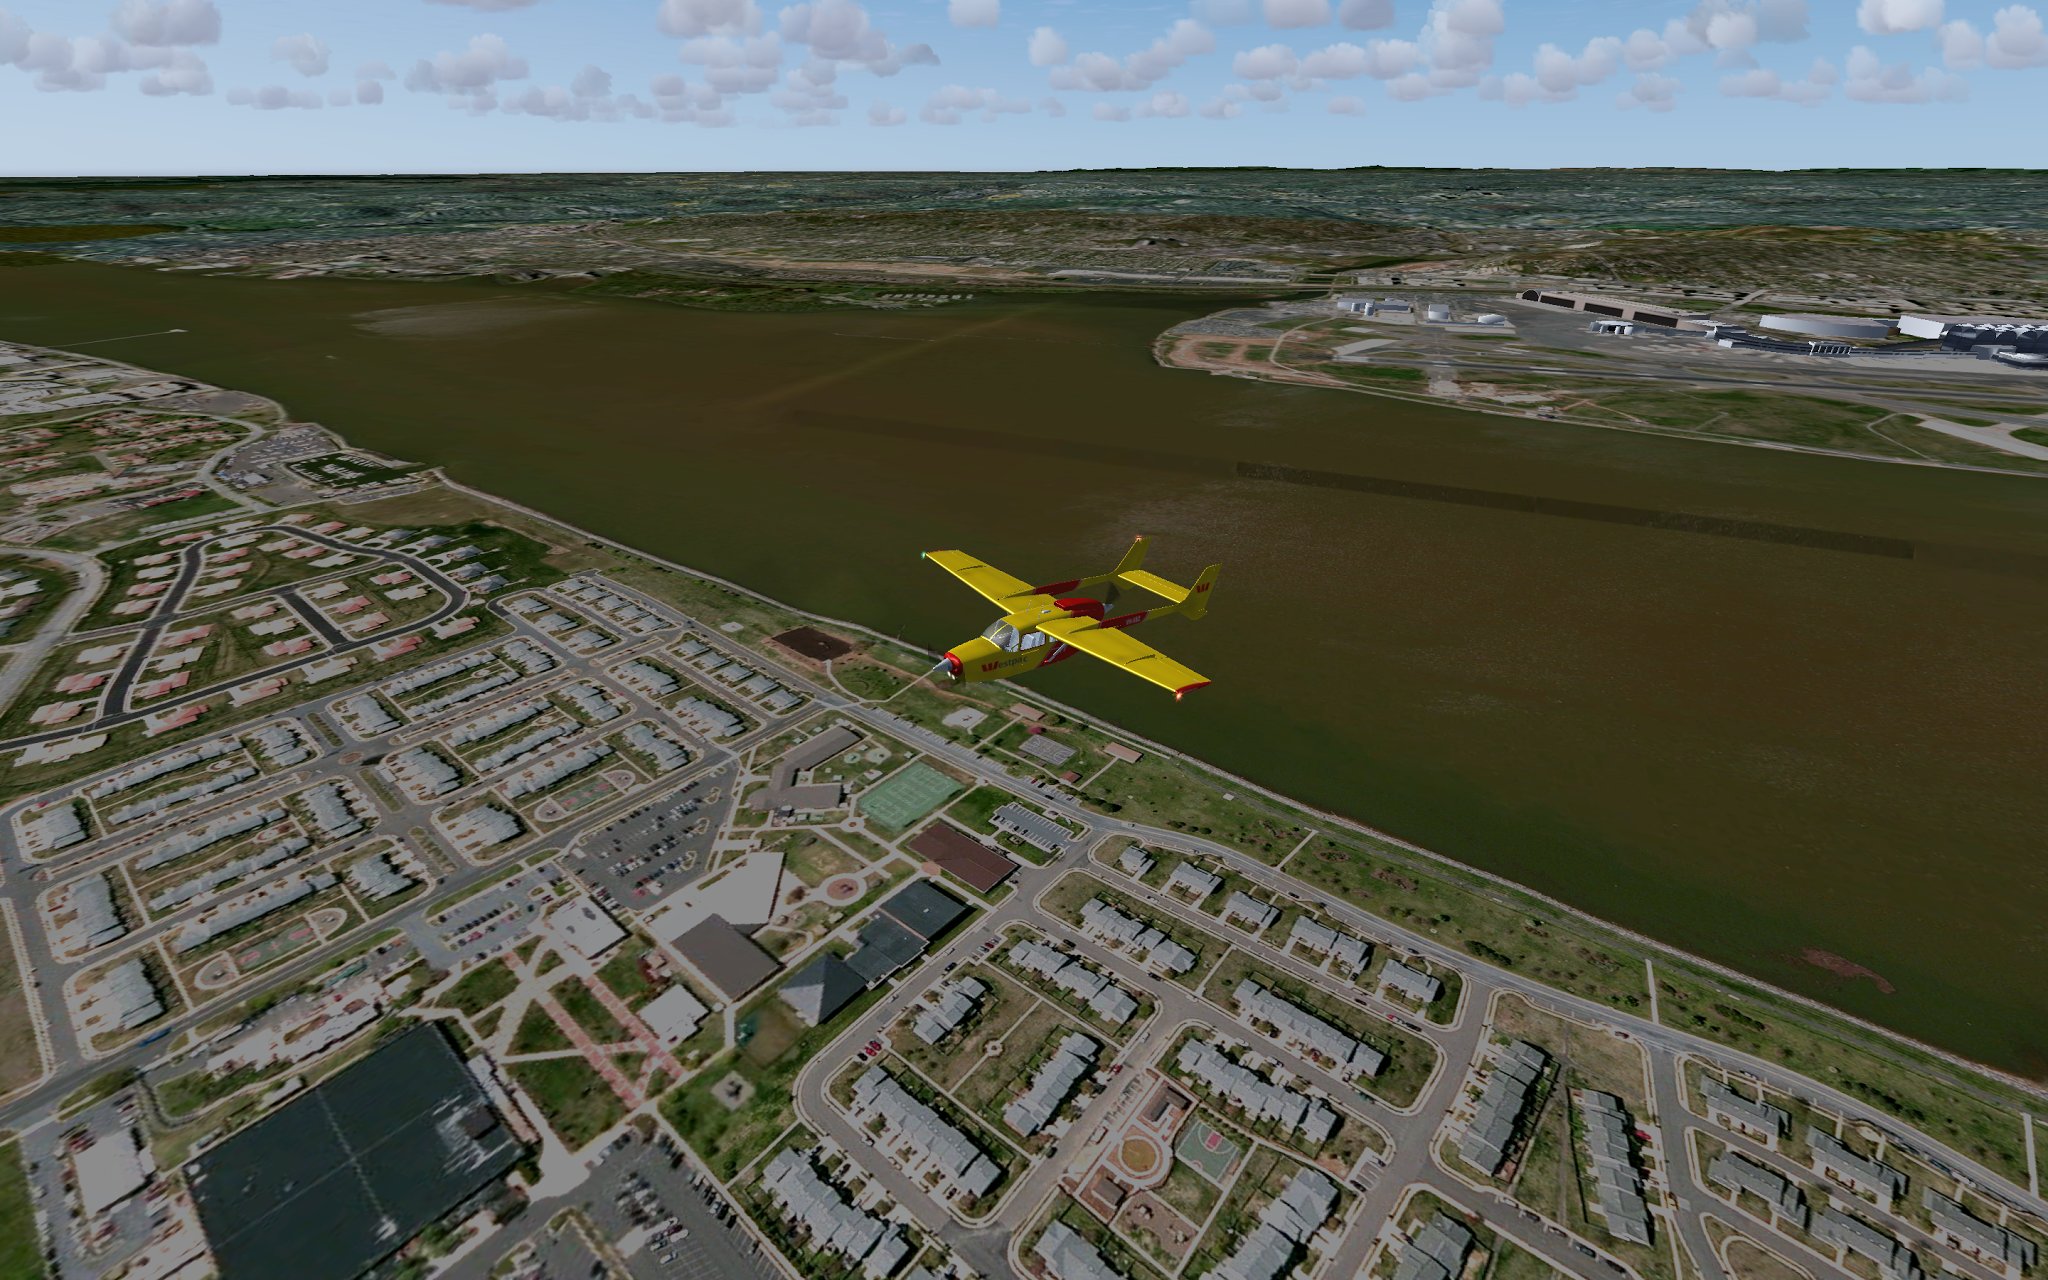
The terrain itself is illuminated by light which has suffered Rayleigh out-scattering. In the dawn zone, this gives it again a color shift, here just slightly towards the yellow in this late afternoon impression of clouds hanging above the coast of Florida:

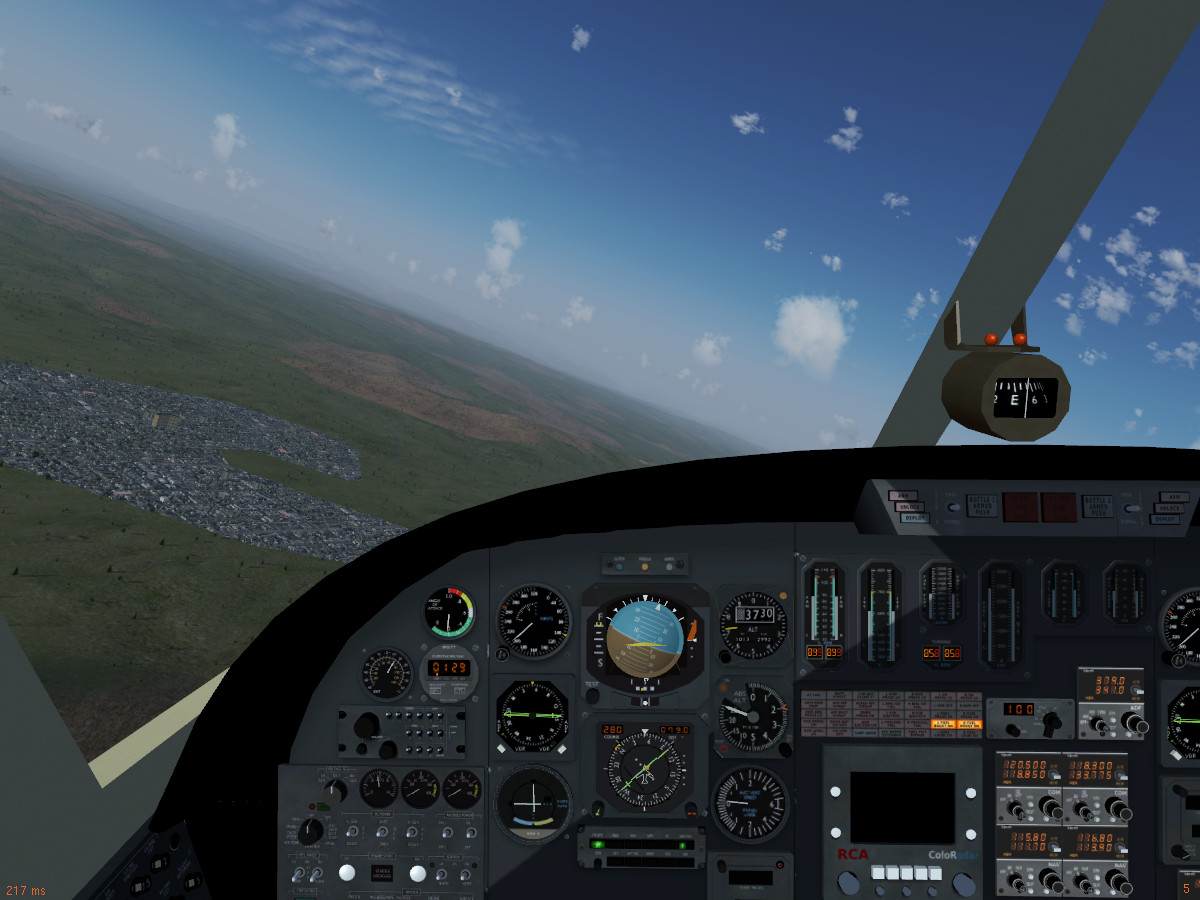
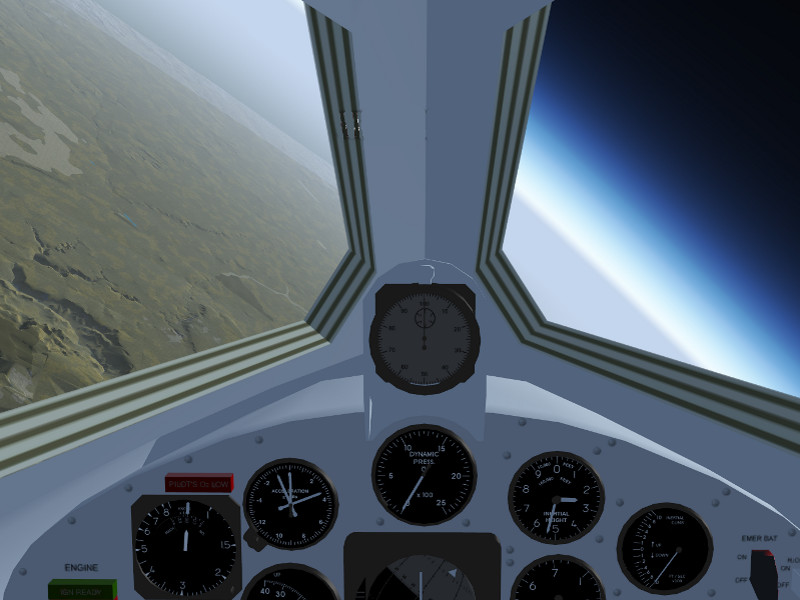
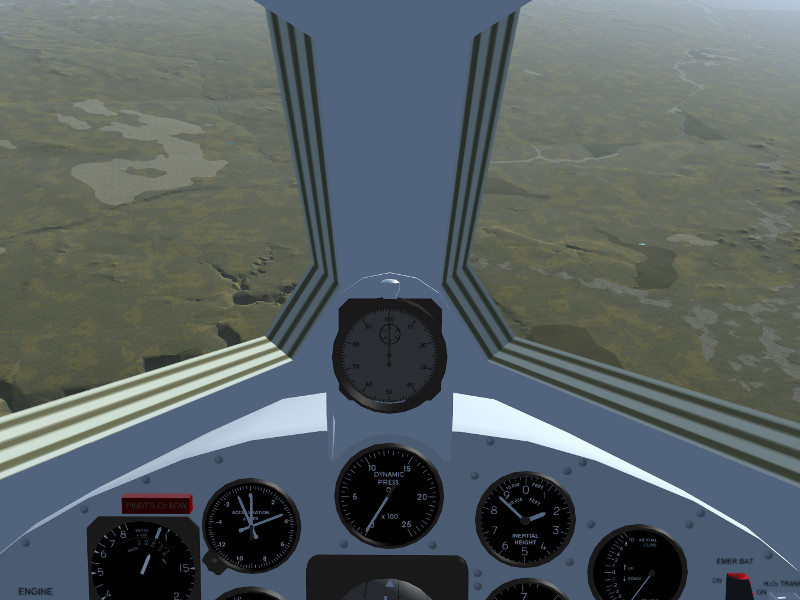
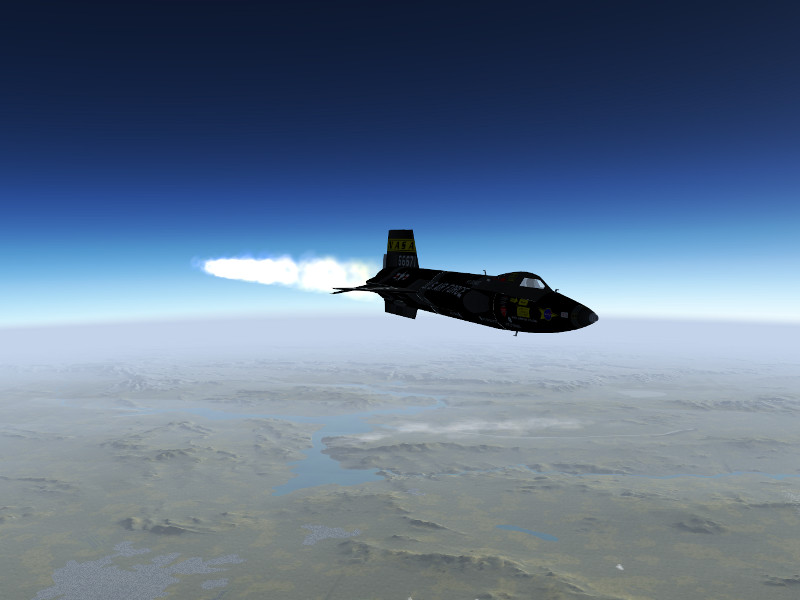
It is quite possible to observe the shadow earth casts into the atmosphere from lower altitude – here is an impression of it from 36.000 ft above an overcast cloud layer:

Clouds

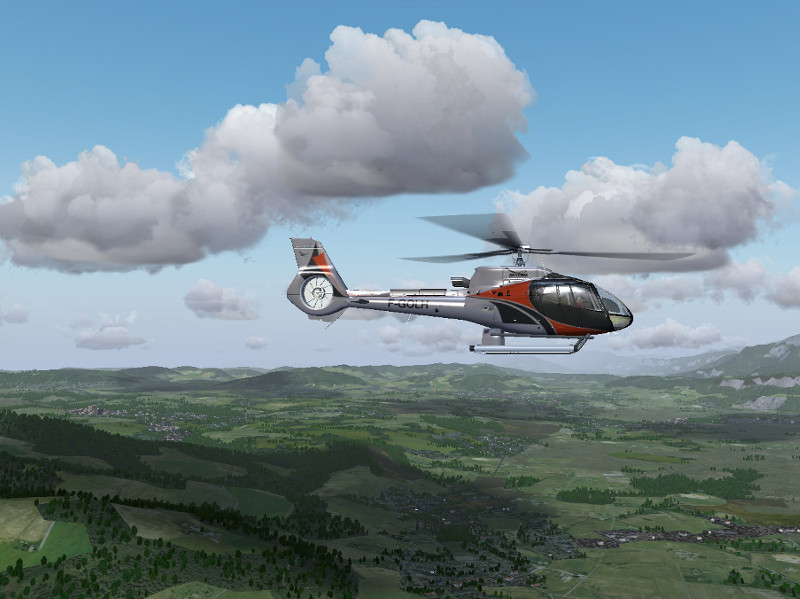
Although they are rendered with rather different techniques, clouds physically are wet haze – thin translucent clouds are Mie scatterers, and thick clouds are diffuse scatterers. Thus, thin clouds light up very brightly in a halo when the sunlight is seen through them due to O-ray Mie in-scattering, whereas thick clouds appear dark and hide the sun due to O-ray diffuse out-scattering.

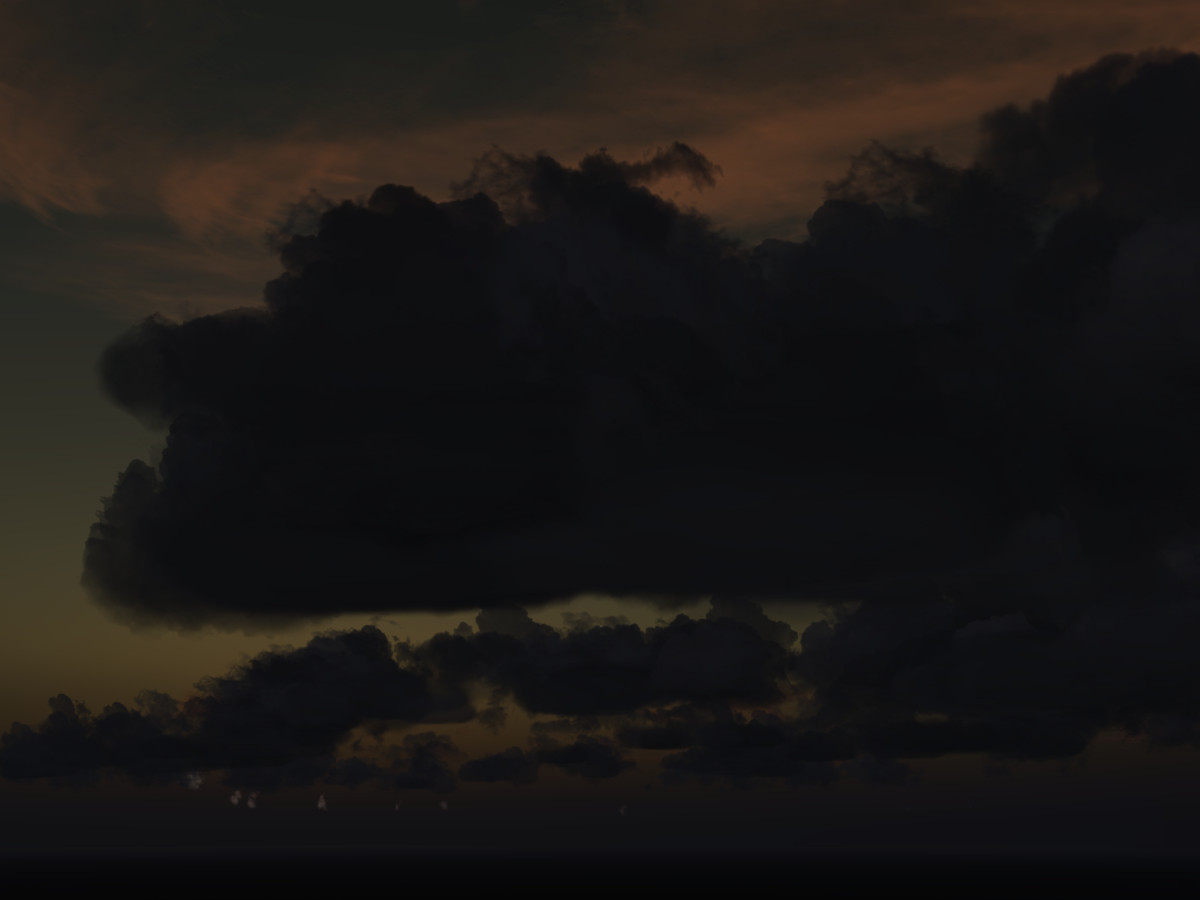
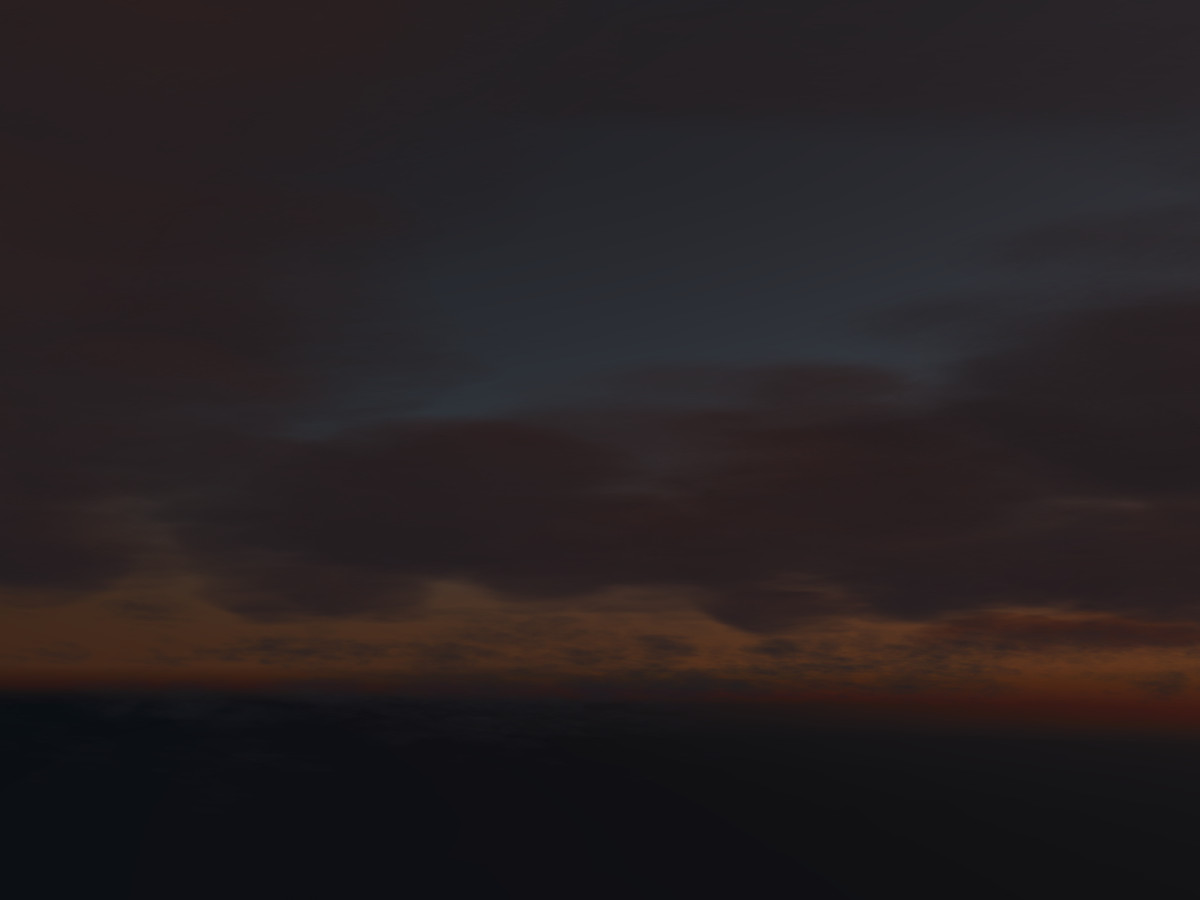
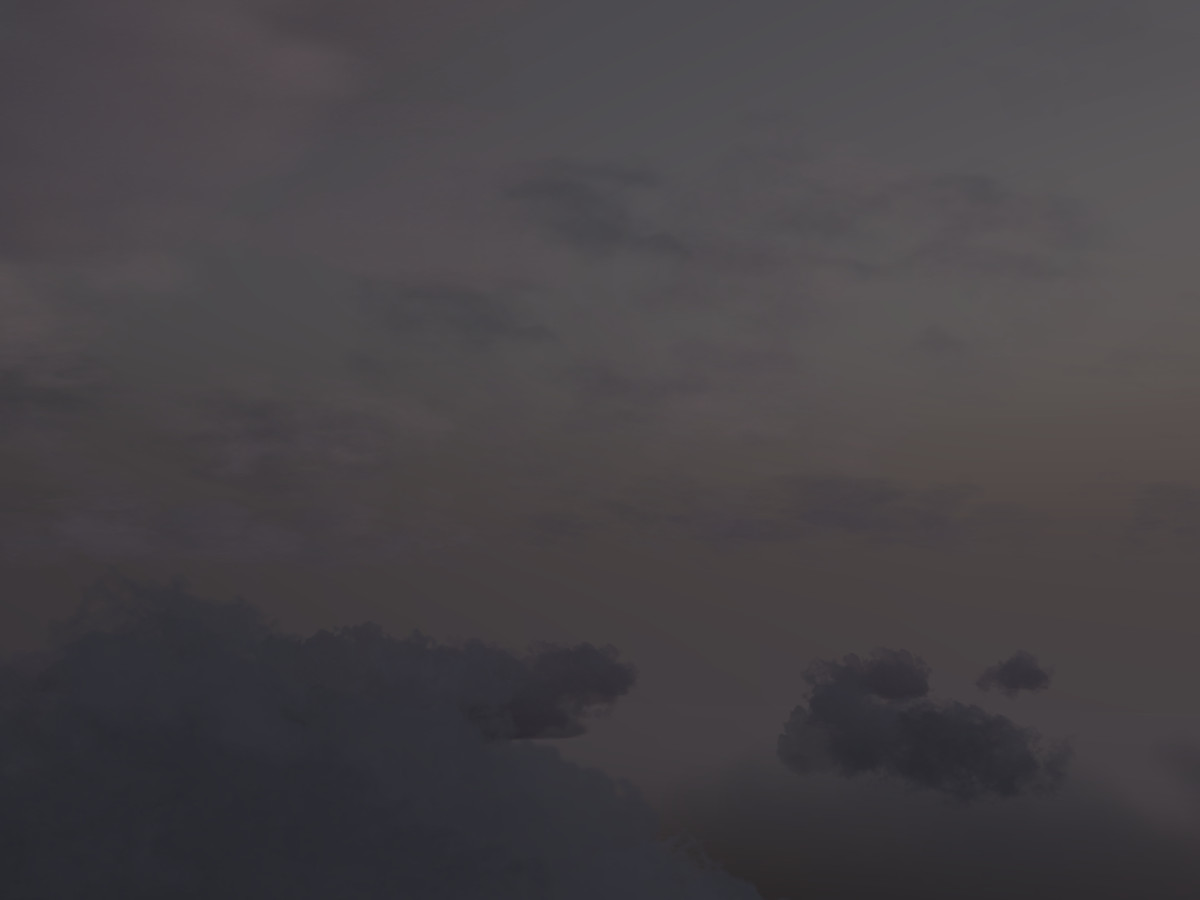
In predawn light, low clouds appear dark since they are yet in the shaded part of the atmosphere, but high Cirrus cloulds can already receive some sunlight:

As the sun comes up, this can lead to a dramatic play of light and shadow, with bright high-altitude clouds seen through a dark lower layer:

Again, the light that reaches the clouds at low sun is subject to I-ray Rayleigh scattering and its color depends on the amount of dry haze. In clean air, the colors of a cloud layer appear more muted

whereas for a high air pollution value the colors are much more strongly shifted towards the red-golden.

However, faraway cloud banks at the horizon can also reduce or alter the incident morning light by I-ray scattering. For thin, scattered clouds, this reduction is small and mornings appear bright

but if the cloud cover gets stronger, the light is reduced

and color shifted

to the point that a sunrise appears no longer red-orange-golden but blue-violet underneath a thick layer:

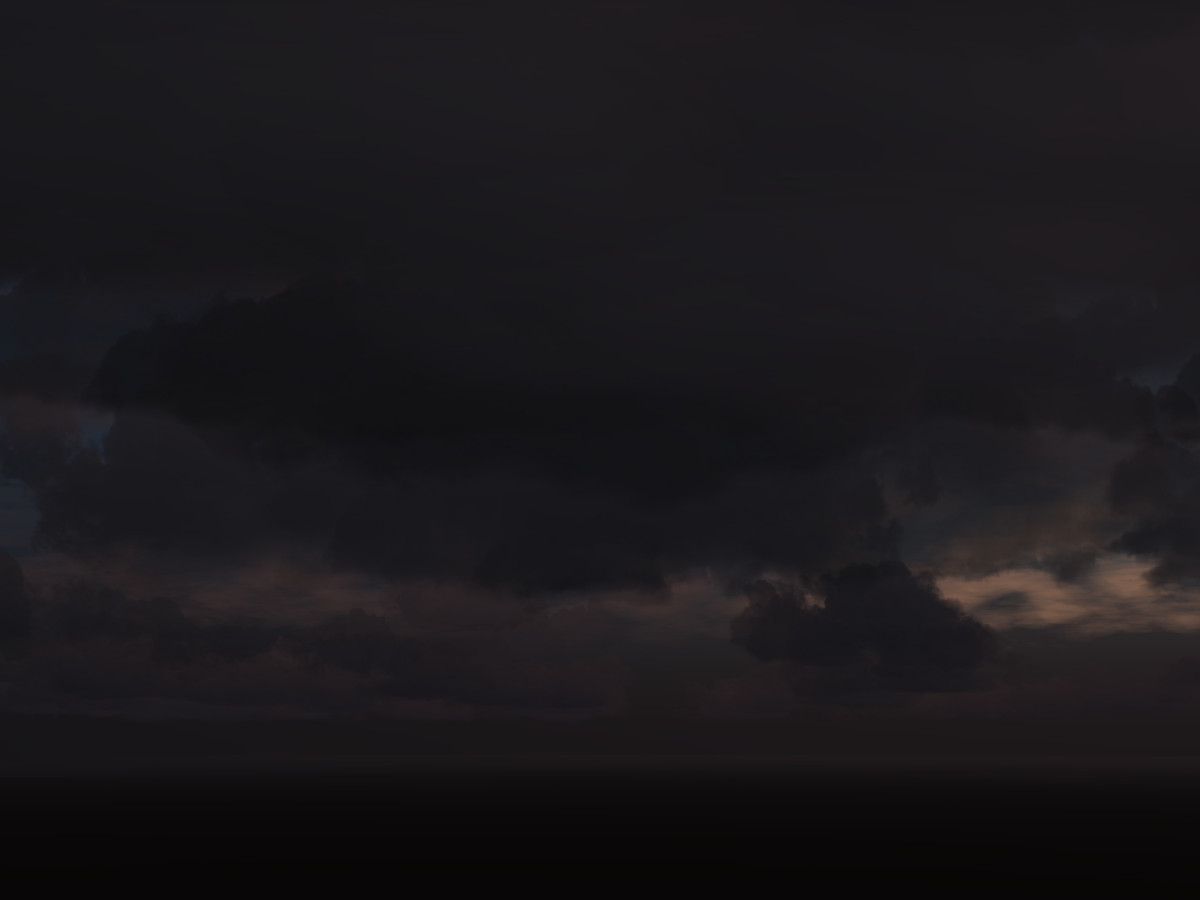
Diffuse haze in the atmosphere acts on the incoming light just the same way as a well-formed cloud layer – the light illuminating the clouds is reduced, and as the direct light is filtered out, the blue indirect I-ray Rayleigh in-scattering becomes more important, shifting colors to violet.

Compare the subtle play of dawn light shining through a cloud for a clear day

with a very hazy day with poor visibility aloft to appreciate the flattening of the color distribution:
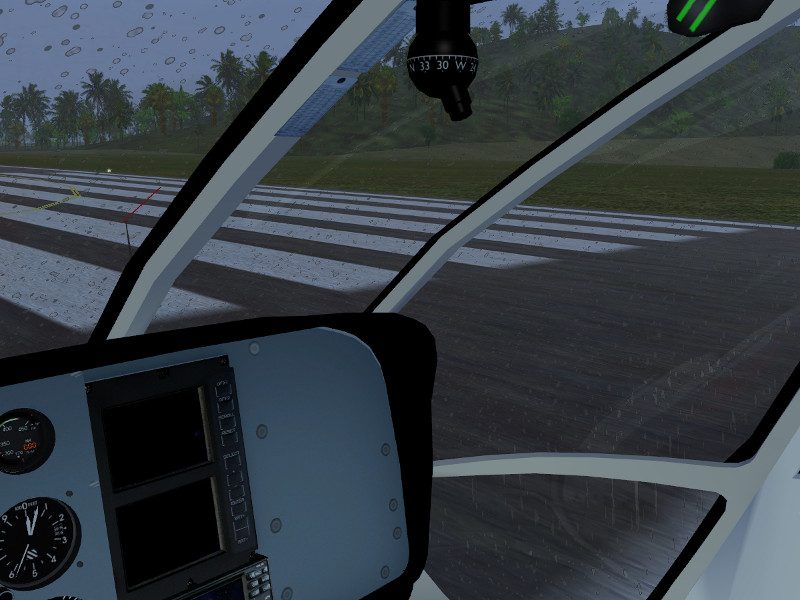
Artificial light

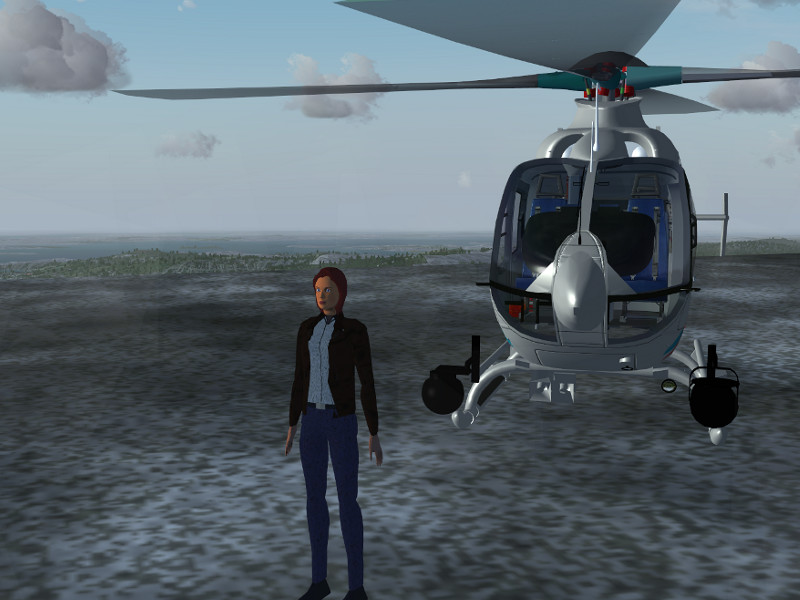
At night, artificial light sources contribute a lot to the illumination – think of the orange glow of haze above a well-lit airport or a city. In principle, artificial light follows the same principles as sunlight, except that the intensity is usually far less, and so the paths through the atmosphere are smaller and effects are only visible in fairly dense fog. Then, often Mie-scattering can be observed, creating halos around lights seen through the fog.

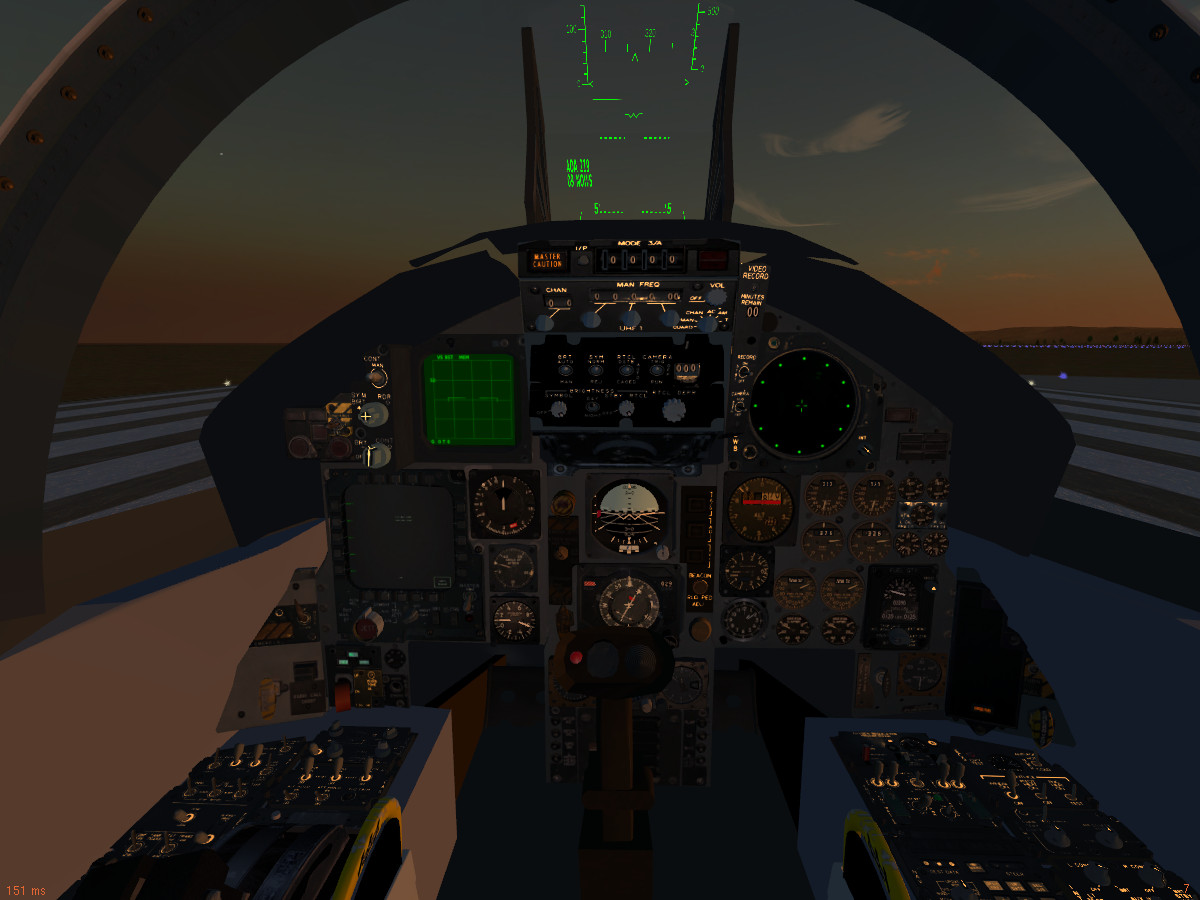
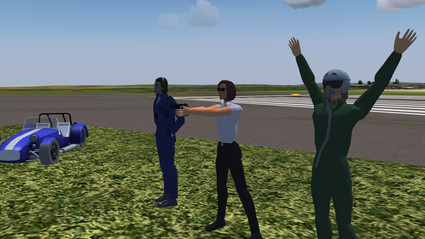
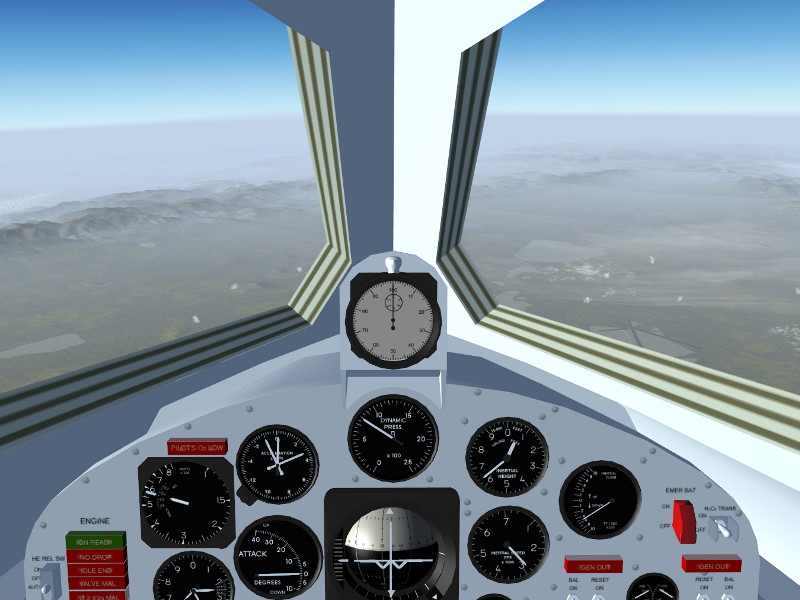
Most of these effects are currently not included in ALS, however the Mie-scattering halos for runway lighting and the illumination of dense fog by landing lights are features already implemented:

Final thoughts

All the different scattering phenomena described above only scratch at the surface of what nature really does. In a real sunrise, clouds may cast shadows onto each other. There’s multiple scattering processes – a brightly illuminated haze layer high above may scatter lots of light down onto lower layers. There’s genuinely colored hazes like dust in a sandstrom which change the colors of dawnlight in yet different ways. There are effects of the human perception which make the eye see very faint or very bright light in colors different from what they actually are (which is why moonlight, despite being actually white light, appears as blue). While ALS tries to capture some of these processes, nature still does infinitely more, and sometimes one wonders how nature manages to get it all done in real time.

But even thinking about some of the phenomena causing it, you will never look at the play of haze and light the same way as before – be it in Flightgear or in reality.

All the screenshots above are rendered with the current development version of Flightgear (FG 3.3) out of the box. On a modern gaming laptop, in flight they typically render with 30+ fps (mainly dependent on visibility and LOD settings and the usage of hires scenery).

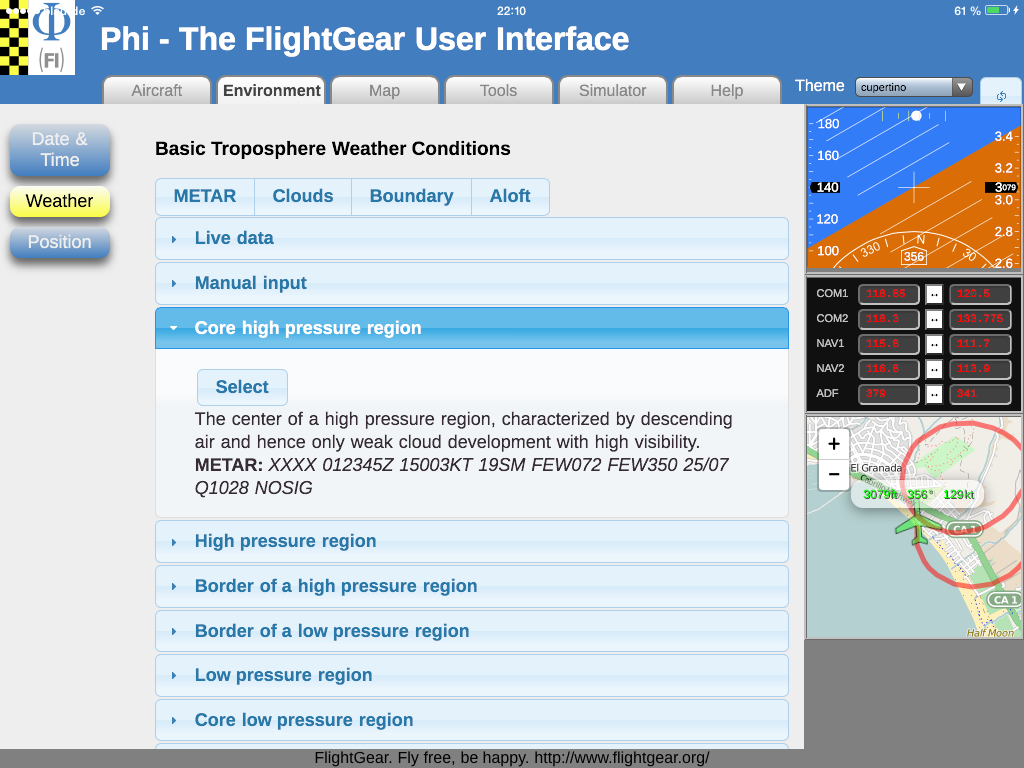
The ALS framework itself takes some 10 atmosphere-related input parameters to generate the visuals of the sky and of hazes, and this leads to an almost infinite variety. Unfortunately the majority of parameter combinations can not occur on Earth (ALS as such is quite capable of rendering a Martian sky), hence the raw input parameters are largely not under user-control. What limits the visuals ALS generates out of the box in practice is the actual range of parameters passed to the renderer by the weather simulation. Here, Advanced Weather using the offline weather engine is somewhat more faithful in generating reasonable light propagation models in the lower atmosphere than Advanced Weather in METAR mode, which is in turn better than Basic Weather, but even Advanced Weather currently exhausts just a fraction of the possibilities ALS really offers.

Modeling a compelling haze distribution and the resulting light attenuation in real time is a genuine challenge, since it is impossible to actually do the scattering calculations (which involve nested integrals) in anything resembling real time, so in every case, fast yet faithful approximations have to be found.

To experiment some with sunrises, try various weather scenarios and play with the lower haze settings and the air pollution on the Advanced Weather options panel.

A preview of features for Flightgear 3.4

Flightgear is constantly under development and as the feature freeze for the next 3.2 release approaches, it is becoming increasingly clear what the next version will have to offer to users:

(to avoid misunderstandings – this is a selection of features currently under development and not a release note, i.e. there is no guarantee that all items will appear in 3.4, nor are the features of 3.4 limited to what is listed here)

Precipitation

Added realism for precipitation:

The precipitation system has been partially upgraded. The speed of falling raindrops now follows a physical scaling with droplet size, and the system renders now hail in addition to rain and snow. The correct dependence of lighting with illumination of the scene has been added. In Advanced Weather, droplet size and rain intensity are now set independently, allowing to realistically render fine spray as well as splattering rain in thunderstorms. A dynamical splash-pattern of raindrops added to the Atmospheric Light Scattering (ALS) runway effect completes the visual impression.

Advanced Weather clouds

Near photo-realistic 3d clouds:

The cloud rendering system has received an upgrade, allowing to let the edges of cloud patches gradually fade out. This makes several types of cloud formations appear even more realistic.

Haze

Have you ever wondered why the terrain appears bluish in the distance?

The Atmospheric Light Scattering (ALS) rendering framework has received a significant upgrade rendering the effects of Rayleigh scattering of light with air molecules and fine dust. This includes the in-scattering of light, resulting in the blue appearance of distant objects, as well as an out-scattering effect which makes colors seen through dry haze shifted towards the red. Combined with the already existing model for rendering hazes, this leads to truly impressive visuals.

Instrumentation

Improved instruments:

A new flexible CDU framework allows aircraft developers to set up extensive CDU pages with relatively little effort. The framework supports both 3D and 2D instruments, multipages, down selecting settings to the scratchpad and various input formats (e.g. FL115 or 11500). It comes with a 2D panel popup screen so you won’t have to pan around the cockpit all the time. The CDU is expected to be introduced on the Boeing 747-400, but the framework has been designed to be flexible and fit other airliners.

Aircraft

Enjoy the latest additions:

The Extra 500 introduces a luxury aircraft one of the most advanced glass cockpits to be simulated by Flightgear. The F-14b has received a significant upgrade with an added JSBSim flight dynamics model. There is also progress on a new version of the X-15 which might make it into the release, as well as the F-20.

Atmospheric Light Scattering

Enjoy yet more interesting visuals:

ALS continues to receive a host of additions, allowing for some stunning visuals:

* tree shadows, rendered using a very performance-friendly technique
* landing and search lights for better night flight experience
* improved implementation of Fresnel scattering on water surfaces, leading to more realistic water appearance
* a procedural rock effect, capable of rendering a large variety of different rock textures and colors across the world

And many improvements more!

Much work is done under the hood which is not all visible:

* improvements to the rendering framework, leading to better performance
* more applications utilizing the FG-internal webserver
* a canvas-based alternative GUI and aircraft center, allowing to manage installed aircraft inside FG

Stay tuned as we fly towards our next release!

The F-14b is back

Ready to launch?

Thanks to Alexis Bory and Enrique Laso, the F-14b has been for a long time one of Flightgear’s most impressive 3d models, with a highly detailed cockpit and a large number of modeled systems.

But it just got even better – are you ready for a ride?

New flight dynamics

Richard Harrison has added a detailed JSBSim model for the flight dynamics based on a number of aerodynamical data sources which makes especially the behaviour at low airspeed very close to the real airplane. This also includes an accurate modeling of stall and departure into spin or flat spin and high alpha control reversal. Wing sweep can be controlled manually and affects the behaviour of the plane,

All of the plane’s control systems are implemented in JSBSim rather than in Nasal (which means they are computed at a much higher rate than the framerate), making the response of the plane more fluid, especially at framerates below 30 fps. All in all, the detailed JSBSim FDM adds quite a lot to the flight experience,

Improved systems modeling

The 3d cockpit has received a number of additions, among them a master warning panel with working indicators, an engine control panel and a master generator control panel. Other switches, such as the fuel cutoffs on the glareshield panel, are now functional, such that an engine startup/shutdown procedure from the cockpit is now possible.

Here is an example of the cockpit view in low-level flight:

And the RIO view:

The full range of operations

Just like the previous YaSim version, the new JSBSim F-14b supports a full range of military operations. The plane is fully aircraft-carrier capable (due to the improved modeling of low airspeed behaviour, carrier landings are somewhat more difficult than with the YaSim version though).

The plane also has a detailed radar with several different modes, capable of tracking targets, and the operation of the AIM-9M sidewinder missile is modeled as well as the M61A6 Vulcan gun.

Full air-to-air refueling capability from e.g. the KA-6 is also modeled:

Enjoy the new F-14b along with many exciting new features on current GIT (3.3) or with the forthcoming stable release 3.4!

(All features presented in the screenshots (bluish atmosphere haze, details on the Vinson flightdeck, improved appearance of water,…) are available in the current development version and will be part of the 3.4 release. The screenshots have been taken off the coast of Corsica and over Nevada, both in the default 2.0 World Scenery.)

Feedback on dds textures required

Should Flightgear switch to dds texture format?

What is this about?

The FG development team is considering to switch the format for terrain textures from png to dds. This would offer a number of significant advantages:

– dds is a compressed format, hence the download size of the FG base package may be decreased
– compressed dds can be directly used by many graphics cards, reducing also GPU memory consumption
– dds stores all texture resolution levels, i.e. no lower resolution levels have to be generated when the texture is used, hence it loads much faster into memory
– the resolution levels (‘mipmaps’) can be customized, allowing for some interesting effects at no performance cost

Practically all commercial simulations use dds for these reasons.

However, the dds compression algorithm is patented, which means that it is not readily available for OpenSource graphics drivers used by Linux distributions. Dependent on the specific hardware, this may or may not be a problem (modern graphics cards typically do not need the driver to process dds, for older graphics cards there are non-patented workarounds available which decompress the dds on the software level). The development team is concerned about making the Flightgear experience pleasant for all users, hence we would like to gather feedback how many users would be affected by a change in practice.

If there are no problems reported, FG will change defaults to txtures in dds format with the 3.4 release, and then phase out the use of png textures.

What would we need?

Flightgear already provides the simple option to test a dds texture set. If you are running on Linux and especially if you use an OpenSource graphics driver, please take 5 minutes to help during your next FG session:

– Open the dialog under View -> Rendering

– Under ‘Terrain texture scheme’, change the default ‘Region-specific’ to ‘Global alternative (DDS format)’ (see red circle)

– Press ‘Okay’ – FG will reload the terrain

– Do you see proper textures on the terrain (they may look different and may also not fit the location perfectly)? If yes, you’re fine. If you see monochromatic colors or other rendering artifacts, your system may have problems with dds.

– Change back to the texture scheme you like best

– Go to the wiki page and report your experiences, ideally including the graphics card you have and the driver you’re using.

Thanks for your time!

Some context for those interested

The visuals you get to see of the terrain in Flightgear depend on texture scheme and rendering scheme being used.

Simply put, the texture scheme selects a set of texture sheets which are mapped to the various landclasses in the terrain, such that a forest is rendered as forest rather than as grass. The old ‘Global’ texture scheme uses one such set everywhere in the world, the ‘Global alternative’ scheme uses a different set, but the format the textures are stored in is dds rather than png, and the ‘Regional’ scheme selects different textures based on what part of the world you are in. So the texture scheme selection governs things like the basic appearance of the terrain, the format the textures are internally stored in and the definitions where in the world certain textures should be used.

However, modern graphics cards allow to modify textures dynamically, or even create them on the fly by Procedural Texturing using shader effects. Dependent on shader quality level, these effects may have quite a pronounced impact on the visuals. If you are not running Rembrandt, you can switch the main rendering schemes runtime using the ‘Atmospheric Light Scattering’ (ALS) checkbox in the rendering dialog (blue circle in the image above) and explore what it does. So in summary, the rendering scheme selection governs just what is done in detail with the basic texture layers selected above (but, confusingly enough, shader effects may even replace textures).

Some examples exploring the different texture and rendering schemes below:

This is the South Rim of Grand Canyon using regional texture definitions and ALS procedural texturing:

Regional texture definitions allow to adjust the rock color to what is prevalent in the US Southwest, whereas the banded rock structure is not part of the texture file but generated procedurally.

Same scene using global texture definitions and ALS:

Using global textures, the rock and grass color is no longer adapted to the region, and also the shader effect no longer replaces the steepest forest patches by rock.

Same scene using global alternative (DDS) textures and ALS:

Switching to global DDS textures does not alter the visuals significantly in this case, the main difference is the texture format and detail resolution.

Same scene using regional textures and default rendering scheme:

The default rendering scheme at high quality contains some texture replacements which are coded globally into the effect framework and do not mesh too well with the regional texture colors seen elsewhere in the scene.

Same scene using global texture scheme and default rendering scheme:

Such global texture replacements in the shader however work better with a global texture scheme.

Same scene using global alternative DDS texture scheme and default rendering scheme:

Here, the dds texture scheme leads to somewhat different colors.

FG supports this wide variety of textures and rendering schemes so that users can customize the visuals to the performance offered by their computer and select the best compromise between good framerate and compelling visuals.

We need different schemes for this, since in trying to render a scene faithfully, we need to decide questions whether an average level of dust should already be included into textures (as done in the global scheme) or added dynamically according to weather (as done in the regional scheme in procedural texturing). The first alternative is preferable on low-end hardware where procedural texturing is too slow, but the second alternative works much better on high-end systems. Similarly, having different texture schemes allows us to provide a quick fallback for users who might experience problems with a dds-based scheme.

A preview of features for Flightgear 3.2

Flightgear is constantly under development and as the feature freeze for the next 3.2 release approaches, it is becoming increasingly clear what the next version will have to offer to users:

Missions

The Flightgear world is becoming more interesting…

[youtube]http://www.youtube.com/watch?v=dU7ikBZOjgk&feature=player_detailpage[/youtube]

A mission subsystem is being added. This allows to define tasks to be completed by a player which then receives points. Visual guidance symbols can be used to indicate the location of the next task. The mission system combines with the Milestone 4 release of the walker,and thus more complex adventures can be built in which the player has to exit an aircraft and walk to a certain location.

The walker subsystem now allows for more complex animated motion and adds NPCs, characters with whom a player can interact. Also, check out the selection of cars and motorbikes to explore the Flightgear world!

Cloud shadows

Finally some shade!

Cloud shadows are notoriously difficult to render, but for Advanced Weather in combination with the Atmospheric Light Scattering rendering framework, there is now an experimental option to add them (at least close to the aircraft) to the experience.

Earthview

See the world from high up!

Introduced to provide better visuals for the spacecraft in Flightgear, Earthview is an alternative rendering engine intended for use at high altitudes. It renders Earth as a simple, textured sphere surrounded by a cloud sphere. The textures are provided by the NASA Visible Earth project. By default, a set of 2048×2048 textures is distributed, but Earthview is intended to allow easy access for users who want to install their own hires texture set. At full resolution of about 21000×21000 pixels per texture provided by NASA, it looks simply spectacular even from just 50 km altitude – see the Vostok capsule above entering the atmosphere.

Built-in http server

Access the property tree in a novel way!

Flightgear now includes the Mongoose web server as a httpd. This allows for interesting new application, for instance merging information from Flightgear and OpenStreetMap or Mapquest, leading to a new moving map application covering the whole world is available which tracks the airplane’s position.

Cloud drawing distance

See clouds out to the horizon!

Flightgear’s weather rendering so far has not been up to the task of showing a plausible view from high altitude. But this has now changed – a new framerate-friendly impostor technique is used to render clouds out to the horizon – wherever that may be (the system has been tested for 1000 km visibility from low Earth orbit).

Rendering improvements

Visuals keep getting better!

Lots of work has been done on the small details. New tree textures at higher resolutions make the forests actually look nice. Novel noise function are used to improve the visuals of snow on steep terrain slopes, to change tree height in discrete patches mimicking patterns of forest management, or to remove tiling artifacts from large-scale agriculture. Enjoy all the details the new version will have to offer.

And many improvements more!

Much work is done under the hood which is not obviously visible:

* The YASim flight dynamics engine is finally being developed further, with some long-standing bugs and limitations being addressed for the time being
* Ground interactions have been added to the JSBSim flight dynamics engine
* a new text-to-speech message is about to replace the old pre-recorded ATIS messages, adding a lot of flexibility
* an interface for allowing add-ons that use FSUIPC (an addon framework for Microsoft Flight Simulator) to talk to FlightGear
* osgEarth integration is still on the horizon

Stay tuned as we fly towards our next release!

Pushing the boundaries – the X-15 story

Suborbital flight with the X-15

Going to the edge of space… and back!

Operational history of the X-15

The North American X-15 was a rocket-powered, hypersonic research aircraft operated from 1959 to 1968 by the US Airforce and NASA. During that time, it set a number of records and greatly expanded the knowledge about conditions in the upper atmosphere and in hypersonic flight, thus ultimately laying the foundations upon which the Space Shuttle was built.

The X-15 reached Mach 6.72 on October 3, 1967, which is still today the official world record for the highest speed ever reached by a manned aircraft. In ballistic flight, it reached a top altitude of 354,200 feet (107.8 km) on August 22, 1963, crossing the boundary of space as defined by the Fédération Aéronautique International and making the X-15 the worlds first spaceplane. The 100 km altitude was only crossed on one other flight, but since the USAF defined the criterion for spaceflight by reaching an altitude of 50 miles, 13 different flights met this criterion and qualified the pilots for astronaut status.

Technical data

The X-15 is powered by the XLR-99 using ammonia and liquid oxygen as propellants, giving the plane a thrust of 70,400 lb and a thrust/weight ratio of 2.07. The rocket engine would only burn for about 80 seconds, the smallest part of the whole flight profile, but this would be sufficient to fling the plane on a high reaching ballistic trajectory or to accelerate it to tremendous velocities. It was the first man-rated rocket engine that could be throttled.

The plane has a thick wedge tail for stability at hypersonic flight conditions, however this produces a lot of drag at lower speeds. This means that the glide slope in the unpowered approach back to base is rather steep, and once back in the lower atmosphere, the X-15 sinks rapidly.

For maneuvering in the upper atmosphere where there is no significant air and the control surfaces do not work, the X-15 is equipped with a reaction control system (RCS) using hydrogen peroxide as propellant.

Flight dynamics of the X-15 in Flightgear is based on NASA-TN-D-2532 ‘Flight Measurements of Stability and Control Derivatives of the X-15 Research Airplane to a Mach Number of 6.02 and an Angle of Attack of 25 degrees’.

The RCS is not modeled in the default version of the X-15 available from the Flightgear download page, however an alternative versions of the X-15 with RCS and 3d cockpit are linked below.

Getting ready for suborbital flight

In reality, the X-15 was dropped from a B-52 aircraft at typically 45,000 ft and 450 kt, and then started its engines. This required a lot of preparation, however we also need to prepare the sim for suborbital flight.


Rendering suborbital flight is nothing Flightgear is designed to do, but as it is a very flexible framework, it can still be made to do it. The main problem is opening up the visibility to values which are plausible from the top of a ballistic arc at the edge of space, which amounts to about 400-600 km. This will require a modern graphics card and lots of system memory (the screenshots below were done on a GeForce GTX 670M with 3 GB GPU memory and another 8 GB system memory, this delivered a framerate of ~20 fps at arc top). Trying to open the visibility to large values can have severe performance impacts to the point that FG becomes unresponsive and can crash FG when memory actually runs out – it is recommended to try suitable settings with the ufo before using the X-15.

Some settings need to be tweaked:

* In order for the terrain to be loaded, the LOD range for terrain needs to be set. In the menu, View->Adjust LOD ranges, and set LOD bare to 500000 in order to allow terrain to be loaded up to 500 km distance.

* Loading terrain doesn’t help if the renderer does not display it. The camera of the renderer needs to be instructed not to clip faraway objects. Open the property browser from the Debug->Property Browser menu, and change into /sim/rendering/camera-group/ and adjust zfar to 500000 (or set the property at startup via commandline).

* Finally the weather system needs to be convinced to produce large visibility at high altitude. For Basic Weather, set the visibility at high altitude accrodingly in the mask. Advanced Weather will do it automatically if Max. Visibility in the Advanced Settings is high enough, however the gui doesn’t allow that, hence use the property browser again to set /local-weather/config/aux-max-vis-range to 13.12 (the slider operates on a log scale which is then converted to the actual value).

Switch randon objects, buildings and vegetation off before the flight – you won’t see them, and they will cost a lot of memory which you badly need otherwise. Launching over islands limits the amount of terrain to be loaded, also World Scenery 1.0 with low polygon count works better than he new World Scenery 2.0.

Finally, in the View->Rendering menu, switch Atmospheric Light Scattering on – this will render the atmosphere visuals.

One problem may be that FG can’t load the scenery fast enough. If the OS caches used files, loading the scenery from disk into memory once with an ufo-flight before using the X-15 may help here.

Climbing into space

Start the simulation in air, i.e. using commandline options –altitude=45000 and –vc=450 — this will produce the state of the X-15 just after having been dropped from a B-52. For a semi-historic trajectory, you can start above Nellis AFB (KLSV) and aim at a course of 240 deg which will roughly get you to Edwards AFB and Rogers Dry lake, the historic landing site for the X-15.

Take a few seconds after the drop to stabilize the plane into a shallow descent, double-check all settings and make sure you’re ready. If all looks well, push the throttle forward till the rocket engine ignites.

The XLR-99 delivers significant thrust, and speed will build up rapidly. We’re far too low for this, so pull gently on the stick till the plane goes into a 45 degree climb out of the lower atmosphere.

After a bit more than a minute, the main engine will cut out, but the X-15 will climb on. With increasing altitude, pressure based airspeed and altitude gauge become unreliable, so take a look at their inertial counterparts on the right side of the instrument panel now.

As the ballistic climb continues, the airfoils are losing effectiveness rapidly – time to switch on the RCS! Operate the BAL switch on the right side of the panel, press ‘i’ to grab the stick for RCS control (which in reality would be located on the left side of the cockpit). Think spacecraft now – there’s no damping force left, so operate the thrusters with carefully controlled bursts to stabilize the X-15. Once you have time to look out, you should see a lot of California. And Edwards AFB is really far, far down!

Back to Earth

Now comes the dangerous part — we’re falling down from 330.000 ft, we’re going to be really fast and the deceleration will be hard. The good news is that the view from the cockpit is now quite a bit more spectacular as the planet comes into view.

Stabilize the attitude using the RCS thrusters while high up. If the X-15 enters the atmosphere in a spin or roll condition, you will likely not survive the entry. As the plane gets lower, the airflow should start to build up, and if everything is going well, the X-15 should align its nose with the airflow.

The ailerons may become responsive below 200.000 ft already, start switching back to aerodynamical controls using the ‘u’ key and stabilize roll.

If you’ve been high up, the X-15 is falling really steeply at this point.

As the ground rushes closer, eventually the elevator becomes responsive as well, typically this starts below 80.000 ft. At this point, the plane will be going really fast and the ground approach rapidly. Pull back on the stick gently and watch the g-force. At this speed, even a gentle pull will translate into lots of force. Expect to experience 6-8 g during the pull out and prepare to black out in the worst phase. This is the most dangerous part of the flight.

Of course, if you don’t want to see a blackout simulated, you can always switch it off in the menu.

If everything went well, you should end up somewhere around 30.000 to 40.000 ft in level flight, with Edwards AFB (or whatever your landing site may be) in convenient reach. Now you can start trusting the pressure-based instrumentation again.

From this point, the drag of the stabilizing fins will be felt badly. Glide the plane maintaining about 300 kt. Rogers Dry Lake is a big place, so planning an approach should be reasonably easy.

Skids and gear out for the final approach…

… and a safe landing on the lakebed.

High speed profiles

Historically, the X-15 has not only been flown in high altitude profiles but also in high speed profiles. These are somewhat easier to pilot and control. For a high speed profile, aim at a more shallow climb angle, level off early and try to go horizontal around 100.000 ft, then let the X-15 accelerate and see how fast she will go.

After the engine cuts out, you can simply maintain altitude till the airspeed bleeds off and then slowly descent towards the landing site. Here’s an approach to Edwards AFB from a high speed run, coming in at 60.000 ft now.

Enjoy flying the first spaceplane mankind has built!

Alternative versions of the X-15

B-52 launched X-15 by Enrique Laso Leon (requires startup from historical location and joystick throttle control)

Free launched X-15 based on Enrique’s version, allowing startup at any location and keyboard throttle control, with some sound effects added.

Special thanks

The modelers of the X-15 in Flightgear:

Enrique Laso Leon
Jon S. Berndt

World Scenery 2.0

Together with the release of Flightgear 3.0, a new world-wide scenery is now made available!

Flightgear’s world scenery is based on large-scale processing of publicly available and GPL compatible geodata. There is practically no manual intervention involved, which means that the scenery team can’t decide what quality the scenery will have at a certain location, that is only determined by the quality of the available data.

Thanks to the efforts of developers in bringing the processing toolchain up to date, the new official scenery with much better resolution than the previous scenery has now been possible. The new scenery is already available via Terrasync, but it requires a recent version of Flightgear, older versions are not capable of handling the vertex number of the new terrain mesh.

This FlightGear World Scenery was compiled from:
– ViewFinderPanoramas elevation model by Jonathan de Ferranti
– VMap0 Ed.5 worldwide land cover
– CORINE land cover 2006v16 for Europe
– Several custom land cover enhancements
– The latest airports (2013.10), maintained by Robin Peel of X-Plane
– Line data by OpenStreetMap

In general, airport layouts are now improved and updated all over the world, major roads and rivers are drawn to much higher accuracy than previously and the elevation mesh resolution is increased everywhere.

Europe

The most stunning improvements are found in Europe, where in addition to the increased resolution of the elevation mesh, also the CORINE database provides high resolution landcover data. This makes the visuals both in mountain regions as well as plains much more applealing. Combined with regional texture schemes and procedural texturing, an almost photo-realistic effect can often be achieved.

Corsica, France seen from above in morning fog (utilizing Mediterranean texture scheme) :

Details of Corsica, France in low-level flight with the F-20:

Fjell lands in Norway (using Scandinavian texture scheme):

Norwegian fjordlands:

Ouside Europe

In the absence of CORINE data, improvements in the landcover rendering are not as dramatic, which leaves flat terrain largely comparable to the previous version of the scenery. However, mountainous regions benefit enormously from the improved elevation mesh resolution. The rendering of light and shade, transition shader effects and snow effects all key on elevation gradients and allow in essence to render the terrain with much more visual detail despite the lack of detailed landcover.

Desert hill chain near Tabas, Iran, seen from the ground (using Middle-East texture scheme and dust shader effect):

As above, seen from the air:

The Grand Canyon, USA (using dust shader effect):

View of the Grand Canyon, USA from high altitude:

Nanga Parbat, Himalaya, Pakistan seen across the Indus valley:

Himalaya north of Nanga Parbat:

Thanks

Special thanks to the people involved:

John Holden
Olivier Jacq
Vic Marriott
Julien Nguyen
Gijs de Rooy
Christian Schmitt
Martin Spott
James Turner
Markus Metz
Pete Sadrozinski

A preview of features for Flightgear 3.0

Flightgear is constantly under development and as the feature freeze for the next 3.0 release approaches, it is becoming increasingly clear what the next version will have to offer to users:

Scenery 2.0

The next generation scenery has finally arrived!

After long years of waiting, a new version of the world-wide scenery shipped with Flightgear is now being rolled out. This scenery makes use of CORINE data in Europe, utilizes other custom enhancements elsewhere in the world, brings new and improved airport layouts and includes roads and other line data from the Open Street Map project. Especially in the CORINE covered regions, this leads to a much better visual appearance.

Novel water effects

Enjoy watching the shallows around tropical islands in fine weather!

At high quality levels of the water shader, a global water depth map is now used to change the water color in the shallow regions around islands and close to the coast. Especially in the Caribbean, this corresponds to a significant improvement in visual quality. The effect combines with the other variations in water color based on weather and base color due to algae or mud content.

The walker

Now you can get out of your airplane!

The walker project allows to leave an aircraft and explore the scenery on foot. This effectively allows adventure-game like scenarios in Flightgear such as The evil Graveyard where the walker also interacts with the scenery. Combined with the hires procedural terrain texturing options, you can start exploring the scenery from quite a different perspective and walk into your favourite virtual airport bar after a long and exhausting flight.

New airplanes

Enjoy a few new, highly detailed airplanes!

Some recent addition to the list of Flightgear aircraft, the new Boeing 707 (shown above) and the Robin DR400 Dauphin (a single propeller engine plane) impress with impressively detailed modelling of the cockpit, plenty of attention to realistic flight dynamics and especially in the case of the 707 a sometimes frustratingly realistic level of systems modelling.

More complex glass cockpits

Enjoy more realistic instruments!

The canvas 2d rendering technology allows the creation of more realistic glass cockpits with complicated instruments. Shown here is the new PFD and ND of the Boeing-747-400 as an example.

Phototexturing using osgEarth

Explore the scenery textured by aerial imagery!

An experimental implementation of generic phototextured terrain using osgEarth is now on the way and might make it into the 3.0 release. Once enabled, osgEarth renders the terrain scene by building the textured geometry at runtime from raw source imagery and elevation data. The input data can come from a variety of sources including web mapping services or local source data (e.g. geotiff) stored on disk. This feature is runtime-switchable from the default scenery rendering.

Better rendering of fog and haze

We take bad visibility seriously!

For some 3d applications, fog may just be a device to hide the terrain in the distance, but in Flightgear rendering fog and haze is taken quite seriously. The Atmospheric Light Scattering framework now comes with an improved way to render fog patches and variations in fog layer altitude, combined with even more impressive lighting of fog in low sun. You’ll never enjoy bad visibility this much!

And many improvements more…

And that’s not all:

* new regional textures for Scandinavia, Ascension Island and Corsica
* user-controlled moonlight effect for the Atmospheric Light Scattering framework
* added and improved airplanes
* more AI traffic/models
*…

Stay tuned as we fly towards the next release!


b